Create a vintage atmosphere in the house: original crafts from old books
Probably, in every house there are many read, irrelevant or simply old books. They litter space, but not everyone decides to throw them away. We hasten to please you, it is not necessary to do this. After all, books can be given a second life by slightly transforming them into new, beautiful objects that will delight you and the whole family.


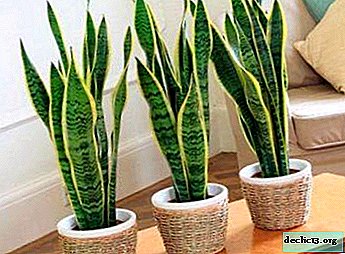
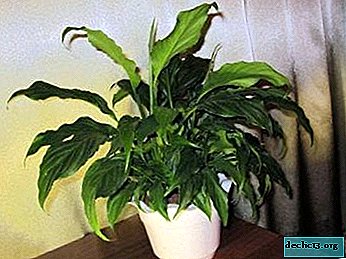
Flowerpot for succulents from the book
As mentioned above, from books you can make a lot of different, stylish items that will decorate your home. Therefore, do not be upset or afraid to cut books. Always remember that you give them a second life.

Necessary materials:
- thick book;
- succulents;
- priming;
- moss;
- pebbles and sand;
- PVA glue;
- stationery knife;
- ruler;
- pencil;
- parchment or cellophane.
We glue the pages together to make it convenient to work with the book further.

We open the cover and several pages of the book. We proceed to cutting the required size hole for planting succulents. To do this, make notes with a pencil and a ruler and start cutting with a clerical knife.

We put parchment paper or cellophane inside the hole so that water does not fall on the book.

At the bottom we put sand or pebbles, and then the soil. We plant succulents in a prepared pot.

We cover the soil with moss to make the composition look more attractive.

We cut off the excess part of cellophane or paper and cover it with moss.

The result is a stunningly beautiful composition that will not leave anyone indifferent.

A flowerpot from a book can look completely different. It all depends on your imagination and the availability of materials. Therefore, be inspired by ideas and experiment for your pleasure.


Unusual clutch from an old book
A rather unusual solution is to make a stylish clutch from an old book. Nevertheless, such a product looks really very beautiful, so it will definitely please every girl.

To make it yourself, we will prepare:
- hardcover book;
- PVA glue;
- universal glue;
- adhesive tape;
- ruler;
- cover fabric;
- stationery knife;
- brush;
- a thread;
- needle;
- scissors;
- metal lightning.

We cut off the block of pages from the book, leaving only a hard cover. From the fabric, we cut out two rectangles to fit the book, as well as two strips of adhesive tape. We connect the fabric with a binding with an iron, as shown in the photo. 
If desired, we make the same blanks, but in different shades.

Cut four squares of the same size. We place one end of the zipper between two pieces of fabric and stitch it on the sides. Fold the fabric in half and stitch it again. We repeat the same thing on the other hand. Cut off all excess edges of the fabric.

From the fabric we cut out strips of length, like lightning. We sew together the details, as shown in the photo.

Tuck the end of the zipper and glue it inside the cover. Leave to dry completely and open the zipper. We repeat all the same with the second side.

We cut out two rectangles from the fabric and cover them with the inside of the book. This is necessary so that it has a more aesthetic appearance.

We leave the clutch for several hours, so that the glue dries well.

This clutch bag is definitely suitable as an addition to a stylish image for a party. But if desired, it can be used as an organizer or for storing various trifles.


Lovers of elegant handbags and feminine clutches, we suggest you try to implement another master class.


You will need the following:
- book;
- the cloth;
- clasp;
- needle and thread;
- glue;
- stationery knife;
- wax paper;
- paper;
- a pen;
- brush;
- ruler.

We open the book and mark where you need to make a hole for the clutch. Cut it out with a clerical knife. We wrap the outer side of the book with a cloth and fix it from the inside. To make this side look no less attractive, cut out two more pieces and glue them inside.

We take waxed paper and put one piece exactly in the middle of the book. We place one more on each side, leaving ten pages without glue. We fix free pages among themselves with glue.

After some time, when everything dries, the workpiece should look like in the photo.

Using a needle, make marks in those places where we will sew pieces of fabric.

On the working surface we put a piece of fabric. We put the book on top and open it as wide as the clutch should open.
 On a sheet of paper we draw a template for the fabric in a mirror image.

We cut two pieces of fabric, according to the pattern.

Fold them in half and flash, as shown in the photo.

We turn each workpiece and bend them in half.

Sew fabric blanks to the book. Glue the free pages to the pinned ones. After that we connect them with the cover.

On the front side we glue the clutch clasp. The result is a stylish evening accessory.


Invisible shelf from the book: step-by-step master class
If you have preserved the book in an attractive appearance, then this is ideal for creating an unusual shelf with your own hands.

Necessary materials:
- books
- brackets and screws;
- dowels and screws;
- screwdriver or screwdriver;
- drill.

In the center of the book we put the bracket. We insert a drill into one of the holes and push it pretty hard. Repeat the same for each hole. We drill the book in marked places.

We open the book in half and put the bracket. We insert a screw and a washer into it, and fix the second washer on the other side. Thanks to this, the paper will not tear.

We tighten the screw with a screwdriver or a screwdriver. Repeat the same for the remaining holes.

We fix the shelf on the wall and put interesting and favorite books on top.


Original paintings from the pages of the book

For work, you need such materials:
- book;
- black cardboard;
- fine-tip marker;
- Double-sided tape;
- ruler;
- framework.
We find in the book a phrase, a word or a paragraph that inspire you or have a certain influence. This text will not be painted over.

Using a ruler and marker, we make a pattern frame along the contour of the text you like.


Continue shading the text in random order.


We do the same on each prepared sheet from the book.

Using a ruler, tear off the edges of the book sheet.

On the reverse side we glue the pieces of double-sided tape.

We attach sheets to cardboard and insert into frames. Stylish decor from old books is ready!


As you can see, books can not only be read, but also made from them amazing accessories and decor items. In addition, this does not require special knowledge or hard-to-reach materials.
Watch the video: Patchbanks Low End Theory Vol 1 vintage samples review - SoundsAndGear (May 2024).


-
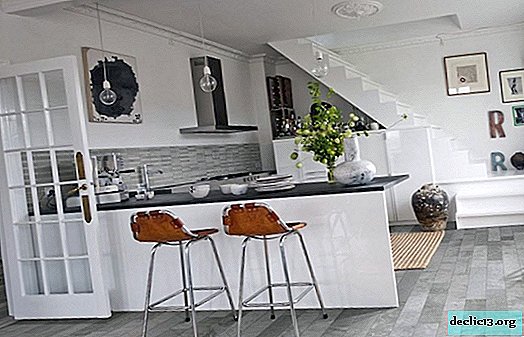
Corner kitchens - we use space to the maximum
Repair or reconstruction of the kitchen is always a lot of difficult decisions, a lot of time spent and a considerable budget for implementation. Perhaps it is difficult to find a space in our homes that would be endowed with such a volume of functions. And it is very often necessary to place surfaces, zones and equipment for the effective fulfillment of all the assigned functions in a very small room. ... -

-

-