How to make a wooden bench with your own hands?
Regardless of the style of the interior, convenience and comfort depends largely on correctly selected pieces of furniture. For example, banquets are often purchased to organize a hallway. This is not surprising, because such a design is not only decorative, but also functional. It is often combined with a shelf for shoes, due to which you can significantly save space. In addition, if desired, it can be done independently. Interested in? Then read on and you will find out all the nuances that are worth considering in the process.

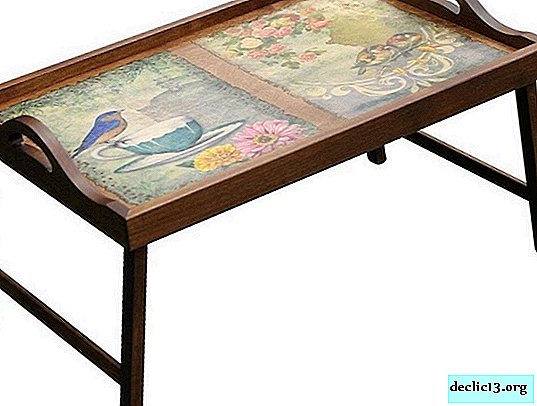
Coffee table bench
Old or simply unnecessary furniture does not have to be thrown away. Indeed, literally every thing can be transformed and give it a second life. Therefore, right now we propose to make a stylish banquette for the hallway with your own hands.

For work, we will prepare the following materials:
- coffee table;
- foam rubber;
- thin foam for lining;
- glue in a spray;
- hammer;
- upholstery fabric;
- scissors;
- pliers;
- marker;
- roulette;
- furniture stapler;
- screwdriver;
- a small piece of fabric for lining.

Before you begin, we recommend that you check whether the coffee table can support the weight of an adult. If so, then wipe it from dust and unscrew the legs. 
For the first layer of the lining will be used foam. Therefore, carefully measure the countertop and make the appropriate marks with a marker.


We make small allowances on each side and cut out the necessary piece of foam.

To make the banquet softer, we recommend purchasing thick foam rubber. But if only thin is available, then we cut out two identical segments and glue them together with relief sides. The glue in the spray is best suited for this. 
Apply a thin layer of glue to the surface of the countertop.

We turn it over and put it on the foam just in the center. We press so that the parts are better fastened together. 
According to the size of the tabletop, we cut out the lining of thin foam rubber or non-woven. Remember that you need to make allowances from all sides.
Put glue on two linings and connect them as shown in the photo. Leave the structure to dry completely. We take measurements to determine the amount of upholstery fabric that will be needed for a banquet.

Cut off the necessary piece of fabric, based on measurements. It is advisable that the allowances are not too small. This is to make it easier to pull the fabric on the countertop. 
On the work surface we put the fabric and align it. Place a tabletop on top, as shown in the photo. On the lower part we fix the fabric with a furniture stapler. It is very important that the material is well stretched and does not move to the side.

Particular attention should be paid to corner processing. The fact is that this part should be performed as accurately as possible. The appearance of the banquets depends on this. Therefore, we pull the fabric well and smooth it so that there is not one extra fold.


We fix the fabric with a stapler and repeat the same on each side.


We take a small segment of the lining fabric, tuck the edges inward and attach the stapler to the inside of the bench. After that, we make small holes for the legs and install them.

Turn over the bench and install in the hallway. If desired, it can be supplemented with a brightly colored decorative pillow.


DIY bench with shelf
For those who prefer more functional pieces of furniture, we suggest paying attention to a banquet with a shelf. It can be used to store shoes or purchase small baskets to put different little things in them.

Before purchasing certain materials, we recommend that you draw a banquette diagram on paper or use a special program for this. This is necessary in order to maximally accurately calculate what is needed in the process.

Necessary materials:
- wooden boards of different sizes;
- saw;
- batting;
- scissors;
- drill;
- roulette;
- foam rubber;
- paint;
- brush;
- Sander;
- screws;
- screwdriver;
- upholstery fabric;
- furniture stapler.


Using a saw, we cut the boards into pieces of the required size.

We begin to create a banquet case. To do this, make holes in the boards, according to the scheme.


We interconnect wooden blanks and form the main body. 


We turn over the wooden structure and attach two planks on the sides, which will be the basis for the shelf.


We attach the remaining boards in such a way that there is a small distance between them, as shown in the photo.


To get rid of hooks and roughness, we process the entire surface of the workpiece with a grinding machine. Only after that we apply a coat of paint and leave it to dry completely. If the color does not fit evenly, you can apply another or two layers.

Using a tape measure, we measure future banquets and transfer them to the foam. Cut off the necessary piece and glue it to the wooden base.

If necessary, a weighting agent can be placed on the surface.

We cut batting and upholstery fabric, taking into account stocks on each side. On a work surface we put a fabric, batting on top and a blank with foam rubber, as shown in the photo.

Carefully wrap the fabric on each side and attach it with a furniture stapler. We recommend paying special attention to corners, as they should be perfectly smooth and even.

Turn over the workpieces and attach to the wooden base. A beautiful, original bench with a shelf is ready!

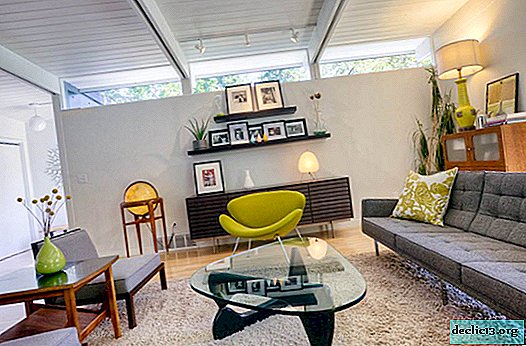
Bench: photo in the interior
As mentioned above, most often a banquette can be seen in the hallway. This is not surprising, since such a piece of furniture is much more convenient than an ottoman.


She is also often chosen for the bedroom. But for this zone we recommend purchasing a design with a soft seat and with additional shelves. They can be used to store bedding.


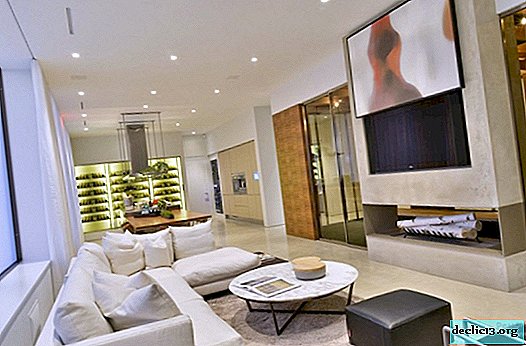
In turn, for the living room and kitchen, concise designs suitable in style are best suited.


In a modern interior just can not do without a banquet. After all, this is not only a functional piece of furniture, but also a decorative one.
Watch the video: How to make a wooden bench for only 6 dollars! DIY wooden bench. The bench in 5 minutes! (December 2024).


-
A loan for starting and developing a business - how to get a loan for a small business from scratch and where loans are issued to small businesses without collateral: TOP-3 banks
Hello dear readers of the Rich Pro business magazine! In this article we will tell you how to get a loan for starting and developing a small business from scratch and where you can get an unsecured loan for your business. It's no secret that creating and developing your own business requires a lot of money. ... -

-

-