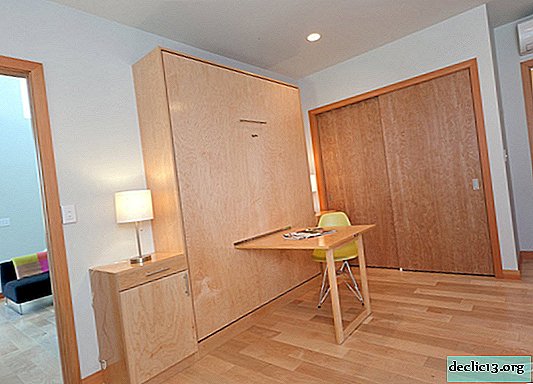
Attic interior
Probably every person who owns a private house wants to get extra square meters. The way out of the situation will be the construction of the attic, but it still needs to be properly equipped and finished. How to use the attic exactly, is decided on an individual basis, because here you can build a bedroom, as well as a personal office or a nursery.
Walls
Warming
Initially, you need to do the insulation of the attic walls in order to minimize heat loss, to make this room comfortable, warm and cozy for yourself or other family members. For insulation, it is best to use mineral wool. The process begins with laying a waterproofing layer, which is lapped with the help of driven-in battens and a special stapler for construction work.
After that, the choice of the location of the walls follows, depending on what the waterproofing material is laid between the rafters. It is important to leave a gap so that air can circulate.
If there is a brick partition, then the insulation should be mounted on both sides. Inside, the insulation is laid with a layer of waterproofing, and on the outside, a lining or drywall is mounted on top of them. Insulation of ramps is not necessary, but laying a waterproofing layer is required, as this will protect the attic from high humidity.


Preparation and use of partitions
If the attic room will be divided into several zones, it is necessary to use partitions, which need to be prepared. In this case, from the floor to the last beam, a board is installed on the ceiling, the thickness of which is about two centimeters, and the width is not more than 15 centimeters. After this, you need to install the bars, which are mounted horizontally. The partition needs to be sheathed with boards, leaving small gaps, and on the inside, heat-insulating and waterproofing materials should be fixed.
After all the work has been carried out, you can do the decoration of the attic with plasterboard. As partitions, wooden bases or a channel are used.


Gypsum plasterboard
The lining process is very simple and understandable to everyone, so you can cope with it yourself. Initially, pediments and slopes are sheathed, after which you can proceed to decorate the ceiling.
During the sheathing of the slopes, wooden bars are installed on the rafters, the distance between which should be about one meter. Horizontal bars are installed in these gaps, after which drywall is installed, and cracks and holes are sealed with improvised materials.

OSB paneling
The advantage of these plates is that a long preparation process is not required, because installation can be carried out by attaching the plates directly to the rafters. Simply put, you do not need to build and install an additional frame, which will significantly save valuable time. In order to fix the panels, nails can be used, but before installation it is necessary to check the surface, it must be smooth and even. For the inner lining, polished products are used.
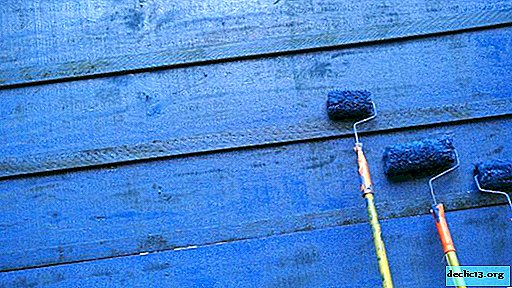
The use of modern OSB-plates opens up new possibilities, because you can finish the walls of the attic inside with fabric or wallpaper. Before applying wallpaper, the surface is primed. Alternatively, oily or acrylic based paints may be used. Aqueous emulsion ink is not advisable to use, it can damage the material or bend it.

Plywood sheathing
A simple and affordable option for decorating the walls of the attic is the use of ordinary plywood. As the final work, plywood can be covered with wallpaper or paint. The width of the plywood should be no more than one and a half centimeters, and its length can vary from 1.5 to 2.5 meters, while the thickness is 5 millimeters.
When choosing plywood, you need to give preference to a moisture resistant option. Plywood is installed on the frame using self-tapping screws or nails with small gaps. If plywood has grooved edges, then no gaps are needed. Initially, plywood finishing is carried out, starting with gables and slopes, after which they sheathe the ceiling.

Lining
Lining is the most popular option for the interior decoration of the attic. Initially, it is cut, and then attached to the wooden frame with nails at the joints. After installing each sheet, you need to check the location of the material level. If this procedure is not carried out, then skew cannot be avoided. After finishing the clapboard has been completed, the surface is varnished.

Ceiling
Initially, you need to determine the height of the ceilings, the best option is 2.2 meters. If the ceiling is higher, then this will not be entirely appropriate; if lower, the tall person will feel discomfort, and the installation of cabinets will become problematic.
Initially, the distance from the rafters to the floor is measured, after which the device for the base of the ceiling begins. A bar is installed between the rafters, for strength they are installed every 70-90 centimeters.
The finished ceiling can be sheathed with wood, plasterboard. Do not forget about heat and waterproofing, they are required. In the end, you can make stretch ceilings or cover the wood surface with varnish.


Floor
In order to insulate the floor, you can use different materials with thermal insulation properties. The best choice is glass wool or mineral wool. Insulation is laid around the entire perimeter, the laying layer should be at least 10 centimeters. To protect the attic from moisture, you need to use a waterproofing layer. If a concrete slab is used as the ceiling, then you need to make a screed.
The floor needs a base, which is a boardwalk. The thickness of the flooring is 4 centimeters, it needs to be laid on beams. The most durable and sustainable option will be pine or other conifers. The main thing is that the boards are dry at the time of installation, otherwise there may be gaps. The tree lends itself to mandatory processing with special solutions and compounds that will protect it from rot, fungi and various pests.


Watch the video: 65+ Awesome Attic Interior Design Ideas You Will Love 2017 (May 2024).


-
Diet of a woman during lactation: is it possible to eat radish with breastfeeding? The effect of vegetables on mom and baby
During lactation, it is important for a woman to monitor her diet. This is due to the fact that some foods negatively affect the production of breast milk, and can also trigger an allergic reaction or digestive disturbance in a newborn. Recently born baby is just beginning to get used to new conditions, so the food familiar to an adult can harm him. ... -
-

-