Making a cabinet for Barbie, how to do it yourself
When buying a doll for a child, do not forget that you will need clothes, a house and furniture. To provide Barbie with everything you need, you need to spend a large amount of money. In order to save money, you can make a cabinet for Barbie yourself, because the result under certain conditions will be better than the store.
Materials and Tools
Before you make a cabinet for dolls with your own hands, you need to prepare the necessary materials:
- cardboard box;
- cardboard;
- white paper;
- paints;
- wooden small sticks;
- scissors;
- glue;
- rulers, pencil;
- paper clips;
- matchboxes;
- miniature eyelets, screws.
It is better to use acrylic paints in work. They contain no toxic components, respectively, they are safe for children. To make the furniture look unique, beautiful, materials for decoration will be required.
Parts preparation
Having the necessary materials and tools, we can make furniture details. Barbie has a lot of things, shoes, handbags, and often they have nowhere to put. For this reason, a cabinet even with two departments will be impractical. For all doll clothes to fit, they need to be laid out on shelves or drawers. To do this, the furniture should be equipped with a large number of compartments of medium and large in height to fit long, fluffy dresses. The main compartment should be equipped with shelves. In the cabinet for Barbie, you can hang holders for hangers, which are easy to do with your own hands. The work is painstaking and requires concentrated attention. In order not to be distracted, all the details should lie near the workplace.
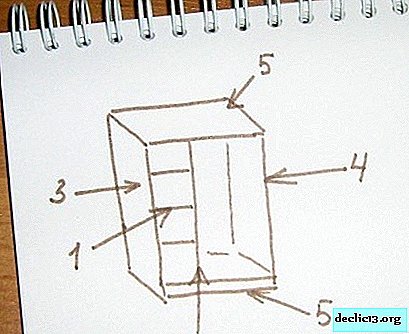 Drawing
 Details
Assembly
Since we took cardboard as the basis, it will not take a lot of time to assemble a piece of furniture. It takes place in several stages:
- cut off the upper part of the cardboard box, glue the edges of the box to make the base of the doll’s cabinet;
- for a presentable appearance, glue the resulting base with plain white paper;
- cardboard is not a strong material, so the cabinet needs to be strengthened. From cardboard we cut out rectangular parts, height, the width of which is equal to the parameters of the inside of the furniture;
- glue the cut out parts with paper, then glue them to the walls of the future cabinet;
- an important step in the assembly of furniture is the door, because doll things should not fall out of the closet. We also make it from two pieces of cardboard high, as does the cabinet itself. The door should open and close without hindrance. We take small hinges and fasten them from the inside to the base, and then to the future doors. If the process is not entirely clear, you can watch it on the video.
- the last step in the assembly is the door handles. You can make them from anything, for example, use small screws or cogs.
Doors are best installed after mounting all the necessary parts in the cabinet.
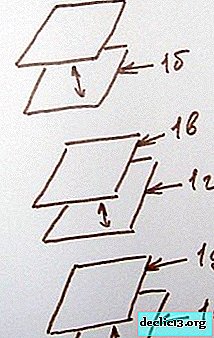 Joining identical parts
 To part 1a, using tape, fasten the wire
 Glue element 1b on top of the tape using the "Moment"
 All parts of the series 1, which are shelves, are mounted in the same way.
 Part 3a marking under the shelves
 We attach the shelf itself and make notes with a marker in the place where the wire will pass
 With thin scissors or a thick needle we make holes on these marks
 Shelf edge is coated with glue
 Wire passes through holes
 The wire is tied on the back
 All other wires are also attached.
 We attach the element 2a to the back of the shelves in exactly the same way
 On the same part, we apply two wires in parallel in an upright position and fasten with tape
 Lubricate with glue, attach 2b and use the press again
 Elements 4a and 4b are also equipped with wires horizontally and vertically, and glued together
 At the top of element 2 we make a small opening
 In part four, we make the same hole opposite and insert a twelve-centimeter kebab stick into them
 At the bottom of the cabinet, under the name 5a, we mark the places where the wires from the walls will pass and pierce
 Immediately lubricate the lower edges of the walls with glue, pass the wires through the bottom
 On the reverse side we tie them to knots
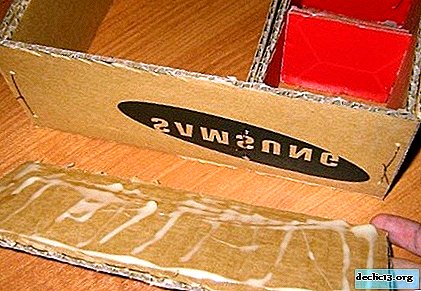 Lubricate the part, apply on top 5b and use paper clips
 Now go to the top of the cabinet (elements 5b and 5c) and do the same job. On the back wall (6a), we mark the walls and shelves, and in the places for the wire - holes
 The ends of the walls and shelves are greased with glue, we apply part 6a, passing wires through the holes, we knot them on the back side, we glue element 6b on top
 The creation of the case is completed, now you need to finish the cabinet. To do this, take a napkin, grease "PVA" and glue the inside of the cabinet
 In front of it is necessary to leave “bare” one and a half centimeters for fastening doors
 Cut the napkin to size and glue the outer part of the furniture on all sides
 For the ends, you can use the "Moment", since with "PVA" the material can break off
Filling installation
The cabinet must be divided into shelves and compartments so that it is roomy:
- we measure the height of the furniture, after we make the plates from the cardboard with which we strengthened the base, then we paste them into the cabinet;
- measure the width and depth inside the compartments, cut out the shelves in the form of a square or rectangle. Glue them with white paper and glue between the divisions;
- the holder for hangers is made of a wooden stick. Cover it with acrylic paint and glue between the two divisions.
Hangers can be made from ordinary paper clips, which can also be painted in any color.
The cabinet can be equipped with drawers. Matchboxes are great for this. There are many videos where the assembly is clearly shown. For a short period of time you have a ready-made wardrobe for Barbie clothes with your own hands.
 We cut out the doors, glue it with a napkin and put a mirror on one of them
 With the help of wire and beads we make fittings
 At the bottom of the cabinet we glue a ten-centimeter kebab stick
 From above we do the same as shown in the photo.
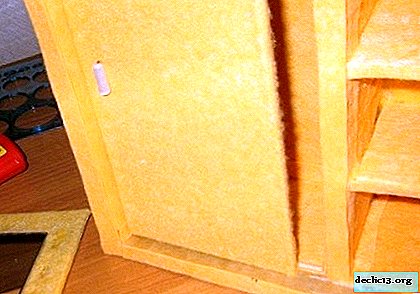 First we put the left door
 After that - right
 Bottom and top glue sticks already in front of the door
 Wire hangers
Dressing
The resulting piece of furniture looks rather boring - you need to decorate it. There is a place for imagination, because when decorating you can use stickers, sequins, sparkles, colored paper, foil. Ribbons, lace, beads and flowers of different sizes will look good. The style of furniture you choose yourself, respectively, and decor elements can be very different. The cabinet can even be painted with pencils or paints of different colors.
Soon there will be a magical transformation of a boring piece of furniture into a stylish, fashionable and bright wardrobe for Barbie beauties. Your child will definitely like it, as you will create it together. Such toy furniture will always be unique.


Video
Watch the video: DIY Dollhouse Bedroom & Bathroom for Barbie (January 2025).


-
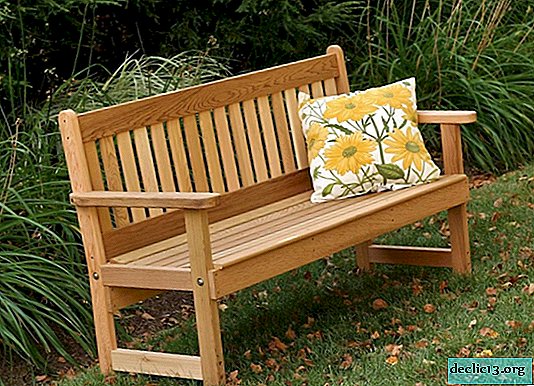
Modern designs of garden benches, DIY
Garden benches are not just furniture that is designed for relaxation. With the help of such products, you can decorate the site, create harmonious compositions that fit perfectly into the surrounding space. If a bench is made with your own hands, then it will fully meet the requirements of the owner. ... -
-

-