The most detailed guide on how to grow a beautiful and healthy adenium from seeds at home
As soon as this amazingly beautiful flower is not called! “Desert Rose”, “Imperial Lily”, “Star of Sabinia” - the names are more like lines from verses than dry botanical descriptions.
And not in vain - this curiosity, exported for the first time from the Arabian Peninsula, amazes with the splendor of its flowering, the originality of the trunk and the ability to adapt to home conditions almost anywhere in the world.
We will tell you step by step how to plant an adenium on your own, so that a beautiful flower is grown from the seed material.
Advantages and disadvantages of this method
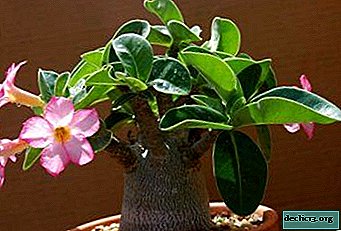
The advantage of propagating adenium through germination from seeds is the rapid growth of caudex - a thickened plant trunk that is formed from the root system and, depending on the host’s imagination, can take a variety of forms. Adenium grown from seeds immediately begins to branch extensively and quickly grows..
 In addition, having shown imagination, from the first months of life, you can simulate the amazing shape of a pet.
But, unfortunately, getting fresh seeds is very difficult! But it is the shelf life of planting material that affects the germination of a plant.
Therefore, buying in an online store is unsafe: you can not only get a variety and color that is different from the desired one, but you can’t get any result from your subsequent work.
Packages on which the shelf life of the seeds is several years, it is better not to take. Collected no earlier than a year - this is the only suitable option.
We also suggest learning how to propagate adenium cuttings from this article.
When to start growing?
Reference! The best months for planting seeds are March-April.Young seedlings need to have time to gain a foothold before the winter and get their share of heat, fresh air and light.
Read more about growing adenium here.
The composition of the soil for sowing
Planting soil must be breathable and nutritious. Acidity - weak or neutral. Peat, as too dense and preventing the germination of the root system, is not suitable. The ideal fit includes:
- Coconut fiber - 50%.
- Deciduous-humus land - 25%.
- Inert baking powder (perlite or vermiculite) - 5-10%.
- Expanded clay of the smallest fraction (or broken brick) - 20% (up to 3 mm).
- A handful of crushed polystyrene foam chips.
Since it is not always possible to find the first component, it can be replaced with soil for succulents. Specialists recommend Kekkila, Morris Green, and Greenworld Kakteenerde mixtures with balanced acidity and excellent root aeration.
They add crushed charcoal and coarse river sand calcined on fire.
How to choose and prepare seed material?
In order to avoid decay of seedlings, pre-sowing seed treatment is required, which will help to neutralize pathogenic fungi spores that have fixed on the surface and support future growth.
Seeds can be soaked in distilled warm water for a couple of hours, but it is best to use a weak solution of potassium permanganate (for 30-40 minutes) or a suspension using crushed coal. This is followed by treatment with a biological or systemic fungicide (e.g. phytosporin). It will be useful to hold the seeds in a solution of a growth stimulator (Energin, Epin) or zircon for 2-3 hours.
Photo
Below in the photo you can see how the seeds of the adenium plant look.


How to sow and germinate?
Important! Seeds will hatch quickly and amicably only if a certain thermal regime is maintained in the room: from 30 to 35 ° С. Air cooling by a couple of degrees, insignificant at first glance, negatively affects germination and can cause rotting of the root system in tender sprouts.When choosing between single and group seeding, it is important to remember the following:
- Sowing in one container is faster and allows plants to grow roots more lively, but requires a lot of space both on the windowsill and under artificial lighting lamps.
- In the second embodiment, there are no many cups and containers, which saves space. However, such crowding leads to weakening of the sprouts: the strong ones begin to stretch in anticipation of the weak, and you can miss the moment of transplantation into individual pots (2-3 months after sowing).
Step-by-step landing instructions
Planting seeds of adenium is carried out in several stages:
- A drainage layer is laid at the bottom of the selected container, on top of it is half the extent of the moistened substrate.
- Seeds are laid flat, at a distance of 3 centimeters from each other, slightly deepened and sprinkled with the rest of the mixture 5-10 mm thick.
- The container is covered with a lid (you can use half a plastic bottle, bag or cling film) and put in a well-heated place. For example, to a central heating battery or heater. A few teaspoons of water are poured into the pan.
- In the mornings and evenings, the lid is removed for half an hour ventilation. Every day the soil is sprayed from a spray bottle. Drafts should not be allowed, as well as direct sunlight.
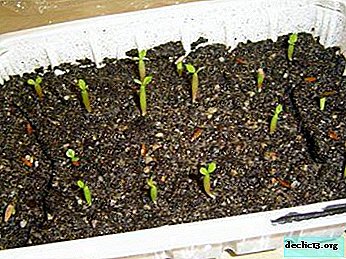 Shoots appear during the first week, most often after 2-3 days. After pecking the seeds, they must be illuminated with a fluorescent lamp all 24 hours a day and regularly pour water into the pan.
Gradually, the backlight is reduced to 18, then to 16, 14 and 12 hours a day. The bottom heating is preserved (you can use an heating pad, drying for shoes, any other improvised means).
- Often, the sprout comes to the surface with a shell that prevents cotyledon leaves from opening. Such a shell must be removed, otherwise the germ will die.
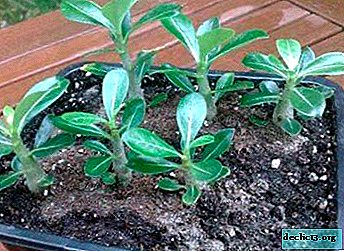
- With the advent of the second pair of leaves, stronger adeniums are transplanted into pots of diameters of 5-6 cm. Since the root of young plants develops powerful and large, the pot should be deep, classic.
 Shoots appear during the first week, most often after 2-3 days. After pecking the seeds, they must be illuminated with a fluorescent lamp all 24 hours a day and regularly pour water into the pan.
How else to sow adenium seeds is described in this video:
Can I plant in open ground?
Unfortunately, it is impossible to plant adeniums in open ground - they do not take root in the Russian climate. But it is possible and necessary in the summer months to take the plant to the open balcony or to the garden.
Follow-up care
- Lighting.
A south or southeast window is suitable for the plant. The more light it receives, the more abundant and brighter the flowering will be. The most burning sun rays are not afraid of adult leaves, but young ones need to be shaded at noon.
Attention! On cloudy days, the plant needs backlighting with a fluorescent or phytolamp. In winter, during the period of rest, it is better to remove the adenium deep into the room. - Watering.
Summer watering is plentiful and frequent, with drying of the top soil layer, about 2-3 times a week. In winter, it is rare only when the entire mixture in the pot dries. The water used is filtered, warm.
- Temperature.
The higher the ambient temperature, the higher the humidity should be and vice versa. Optimum mode: 25-30 degrees in the summer, in the winter at 16-20 the plant discards leaves and goes into hibernation.
- Top dressing.
 Fertilizer is applied only during the period of active development. Organic fertilizers based on pigeon or chicken manure are used, as well as complex mineral fertilizers (Monophosphate, Kemira).
Young plants (up to 3 years old) are fed with fertilizers with a large amount of nitrogen, age - with a small.
If the plant is healthy, and the conditions are optimal, mineral fertilizers are used once a week (1/4 of the recommended concentration), organic fertilizers are used every 3-4 weeks (also 1/4).
In other cases, top dressing - once a month in the same volumes. An hour before application of fertilizing, the plant is watered and sprayed. Fertilizer should not get on the ground parts of the plant. Foliar top dressing is rarely used, with a clear deficiency of trace elements.
- Pruning.
Necessary for:
- Formation of a beautiful crown.
- Enhancing plant growth. This procedure is especially necessary for plants older than 5 years.
For young plants, starting from 3 months to 3 years, it is better to pinch, i.e. removal of 2-3 centimeters of the top or branches from the side. Before trimming, the adenium is washed in warm clean water, the cut is made at a distance of 1-1.5 cm from the caudex.
Sick parts of the plant are removed to healthy tissue, and the cutting tool is disinfected in alcohol. Abundant secretion of juice stop after 1-2 days. The minimum cutting height is 10 centimeters above the soil. Very thin shoots that come out after pruning are plucked.
Curved, soft, rubbing stems rubbing against each other are also removed. To stimulate growth, you can remove too thick. Hemp should not remain after trimming. The cut site is dried for several minutes in the air and lubricated with garden var, special balm or paste. The lack of putty is not critical, but can affect the healing of slices.
Important! Adenium is a poisonous plant. Small wounds and scratches should be glued with a plaster. It is best to wear gloves and wash your hands and tools thoroughly with soap and water.To prevent juice from getting into the eyes or mouth of pets and babies, do not allow the plant to come into contact with it.
Pruning and pinching during the dormant period (winter and autumn) are not done. Suitable months are March-April, simultaneously with a plant transplant.
 Fertilizer is applied only during the period of active development. Organic fertilizers based on pigeon or chicken manure are used, as well as complex mineral fertilizers (Monophosphate, Kemira).
When does it bloom?
Naturally, gardeners are interested in when the young adenium grown from seeds blooms. Most often, the plant gives flowers for 2-3 years, sometimes later - for 4 years.
What if I refuse to give buds?
The absence of flowering in the fifth year of the plant's life suggests that the recommendations for care were violated. Why doesn’t the plant bloom? Possible reasons:
 Lack of light. The restriction applies only to weakened individuals and picked seedlings.
- Low temperature.
- Incorrectly selected planting flowerpot (a large pot causes active growth of roots and there is not enough strength for flowering).
- Forming pruning not performed.
- The plant is overfeeding, as a result of which it builds up excessive foliage and depletes the root system.
- Incorrect watering or excessively cold water.
- Another plant was planted in the flowerpot. Adenium does not like neighbors nearby.
- Heredity - no matter how surprising it sounds, but in some plants it also has an effect. If pollination was between early blooming "parents", then their child, sprouted from the resulting seeds, will bloom too early.
 Lack of light. The restriction applies only to weakened individuals and picked seedlings.
Conclusion
A particle of tropical exotics will come into the house with a guest from the hot southern desert - adenium. The process of growing from a nondescript seed in a real tree is an interesting and slightly exciting process, and subsequent experiments on shaping the appearance are exciting and uncountable.
Watch the video: ADENIUM HACKS AND TIPS: Get a FAT Caudex. How To Make Adenium Caudex 5 Times Thicker? (January 2025).


-
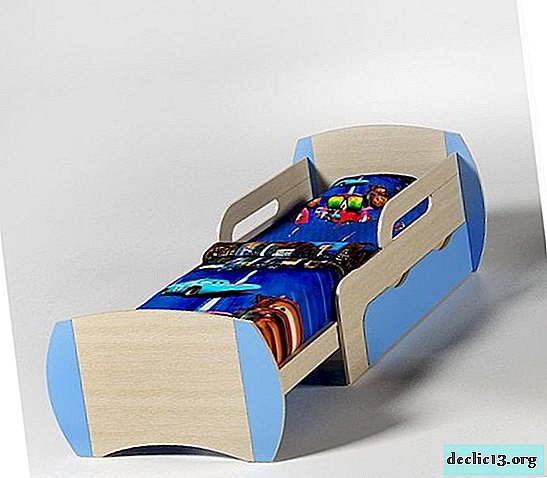
Varieties and advantages of solid wood bunk beds
When planning a bedroom setting, one often has to make a choice between comfort and free space. This problem is especially relevant for families with two or more children. If two separate berths are established, then there is no place to place a desk. An excellent solution is a bunk bed made of solid wood, which takes up less space, but provides a comfortable sleep for both children. ... -
-

-