Is it possible to plant gloxinia from a leaf and how to do it?

Charming gloxinia have long been chosen by the window sills and, along with violets, occupy a solid primacy in popularity among home flowering ornamental plants. When growing gloxinia at some point, the question arises of how to propagate this beauty in order to decorate the house even more abundantly or to make a wonderful gift to someone from relatives and friends.
The simplest and most effective way is to multiply gloxinia with a leaf, that is, a shank. Even a beginner grower can do this.
What kind of flower is this?
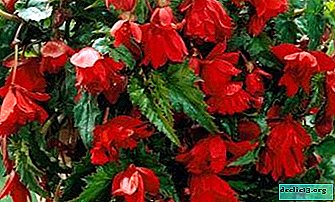
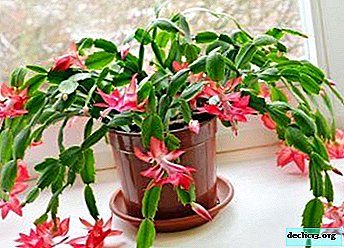
Reference! Flowers come with luxurious ruffles, combining several tones in one flower, flowing one into another or plain, with the smooth edges of the petals. The most popular colors are red, white and yellow.The second name of the plant is Sinningia, it refers to the Gesneriaceae. Sinningia is a perennial, with a tuberous root and plump, dense leaves. It can bloom with ordinary and double flowers. They flaunt over a rosette in the form of velvet bells.
 Initially, gloxinia was an inhabitant of the deciduous tropical forests of Central America, or rather, the most likely to meet her in Brazil. She hides in the lower tiers of the forest, in the shady part.
The climate there is very humid, combined with periods of drought and heat, when the ground part of the plants dries, ceases to function, and the center of life shifts, freezing in the root system, which “falls asleep” in anticipation of beneficial moisture for several months. So gloxinia learned to save its life, adjusting to the climatic rhythms of the region.
How does rooting work?
There are a couple of ways to root gloxinia leaves. The first is the rooting of the leaf in water, when they wait for the growth of small roots and then transplant the stem into the ground. This is the most effective option. The second method consists in the direct planting of the separated leaf cuttings in the ground or in a peat pellet. Experience shows that most successfully the root can be rooted directly in the ground.
When is the best time to do this?
There is no special framework for this process, but the best time to breed gloxinia leaves is the spring season or the very beginning of the summer season.
What leaf to take as a handle?
- Young, with a strong leaf plate and elastic petiole.
- No spots, rot, rottenness.
- From a plant preparing to bloom or during flowering.
- The mother plant must be healthy.
What will it take to root?
 The following materials and tools will be required.:
- Beer glasses are plastic, half a liter or two hundred grams - the volume here depends on the size of the sheet, it is necessary that the leaf is freely located in the glass and rests on its wall, but does not move to the bottom, and does not fall.
- Transparent plastic film, such as bags or packaging in rolls.
- A piece of foam.
- A sharp thin knife or razor blade. Necessarily cleaned and disinfected.
- Freshly cut leaf gloxinia stalk. Cut the leg of the handle carefully, at a slight angle.
Preprocessing instructions
In order to create several units for breeding from one cuttings, the following method can be applied.
- We trim the sheet plate so that a two-centimeter fragment remains from the base.
- From a half of a large leaf, in fact, we cut out another small one, following the direction of the vein pattern, we clear part of the cut fragment from the leaf blade, exposing the central vein, which goes into the petiole.
- Thus, we get two planting leaves.
Further, to root both parts, a single "scenario":
- Put the handle in pre-boiled and cooled to room temperature water. The water level should reach half the glass taken.
- As an additional retainer that protects the leaf from falling and sliding, you can use a piece of foam, putting it in a glass between the wall and the handle from the front of the sheet plate.
- Cover the sheet with a greenhouse bag, securing at the base of the glass with an elastic or a piece of adhesive tape. In this case, do not wind up tightly, but leave a small gap for ventilation. If adhesive tape is used, then it is necessary to fix on the one hand, and on the other to tie polyethylene so that it is possible to fold it.
- The greenhouse is placed in a lighted place where it is warm enough, but without direct sunlight. Once every three days, airing is done, the greenhouse is removed, opening the plant completely.
- The formation of roots and callus will occur within two to three weeks. When the roots gain a length of about one centimeter, then the stage of planting in the ground begins.
Landing
 Soil requirements. Soil is needed light and loose type, permeable and well aerated. You can take a universal peat-based floral soil and supplement it with perlite. Terra Vita is great, you can add nothing to it.
- You can use the same glass, but you will need to dig into the bottom of the drainage holes, four things, at a distance from each other.
- The sides of the glass can be cut off for ease of fit.
- At the bottom, fill up the drainage in a centimeter or two. In a larger cup, put a larger layer. As a drainage, the smallest kermsite or polystyrene crumpled into balls is suitable.
- Then fill the soil mixture.
- Moisten and make a shallow hole-hole with a pen or pencil.
- Carefully put the stalk in the hole, and pour the soil, covering the voids.
- The petiole is buried no more than a centimeter. Callus and roots should be slightly covered with earth. Small deepening will facilitate the exit and development of children.
- A glass with a sheet can be embedded in another, a little larger, for reliability.
- From above again organize a greenhouse.
 Soil requirements. Soil is needed light and loose type, permeable and well aerated. You can take a universal peat-based floral soil and supplement it with perlite. Terra Vita is great, you can add nothing to it.
How to care for a plant in the ground?
- Lighting - 10-14 hours.
- Regular ventilation is required for two minutes once every five days, or once every three days. It depends on the degree of condensation accumulating on the film.
- After 20 days, you can remove the greenhouse, or you can leave it, since under these conditions the tuber will form faster, and the kids will get out earlier.
- Watering gloxinia is done moderate, even restrained, to prevent drying out of the soil, but also not to fill the forming tuberous part.
- Children around the petiole will begin to climb in 60-90 days, but this is not necessary. They can also be planted as independent plants when planting a tuber for permanent residence.
Important! It is possible that the newly formed nod goes into hibernation or goes into active growth in the soil, in such cases, as a rule, there are no children. Both cases are completely normal, the absence of children is not an indicator of deviation.
- The leaf from which the tuber was formed, after three to four months, dries and is removed, if it remains green, you still need to cut it and treat the cut with charcoal powder.
- A glass with a tuber is then placed in the brightest and warmest place, if it is spring or summer time. This will contribute to the growth of children.
- If the process occurred in the fall or the initial time of winter, then the glass with the nodule is sent for the rest period, placing it in a dark place (read more about the gloxinia rest period here).
- After the tuber has formed, it is transferred by transfer to a permanent pot. Care is carried out according to the general rules for gloxinia.
You can find out more about caring for gloxinia here.
Photo of breeding stages
The photo shows the stages of plant propagation:


How to solve the problems with grafting so that the leaf does not disappear
Petioles can rot or lose turgor.
Causes:
- Petioles are affected by rot when planted in the ground or in peat pellets if they are pressed strongly during planting.
- In direct sunlight directed at the seedlings.
- Lack of lighting.
- Using a cutting tool without prior disinfection.
- Chipping off the sheet instead of cutting it neatly.
- Increased ambient temperature, located near the stove or near the batteries, on the south windows.
- An old leaf is taken as a stalk.
- The cuttings are taken in the most unfavorable period of the year.
- The leaf for the cuttings is taken larger than the optimal size - this can lead to loss of turgor. Therefore, too large leaves are better to separate.
- Excessive deepening.
Obviously, most of the problems are solved by the implementation of simple rules for the propagation of gloxinia. Consider the task of getting rid of the cuttings from rot at the preventive stage, since if the stalk has rotted, then it is unlikely to save a fragile plant, much more effective to do it all over again.
Advice! Before planting, you can treat the cuttings with a solution of "White" - one part of whiteness with 11 parts of water at room temperature. The sheet is placed in the solution for no more than a minute, and then it is carefully and thoroughly washed in running water and dried.Here is such a simple scenario for creating gloxinia from the leaflet to an independent plant to be implemented. If all the precautions are followed and all the basic rules are followed, then only after a few months you can get a healthy and beautiful flower.
Watch the video: How to propagate gloxinia from leaf cutting. Part-2 (January 2025).


-
Furniture options for a teenage girl's room, features and selection rules
Making a room for a girl is a very difficult task.To choose a design, you need to take into account not only the desire of adults, but also the preferences of the little housewife, her age category, interest in creative work or sports life. Difficulties can cause furniture for a teenage girl, the choice of which must be approached with all responsibility. ... -
-
-