How to properly plant and care for gloxinia?

Gloxinia is a favorite flower of many gardeners. The peculiarity of this choice in a large number of varieties, lush and long flowering, easy propagation.
Planting gloxinia requires compliance with certain rules, due to which the flower will delight others with its beauty. Read how to plant this beautiful plant and how to care for it in detail in our article. You can also watch a useful video on the topic.
What kind of flower is this?
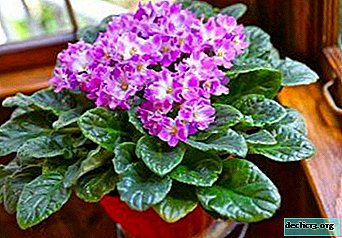
The height of the ornamental plant can be different - up to 5 cm or up to 70 cm. Some subspecies of gloxinia in the homeland grow shrubs. Basically it is a herbaceous plant, the vegetation period in which begins in the spring and ends in the fall.
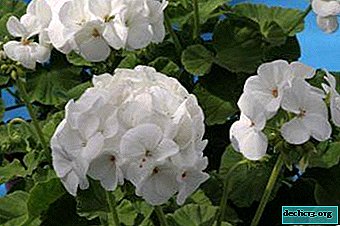
ATTENTION: In winter, the flower is at rest. Its aboveground parts die off, and the rhizome "sleeps". With the advent of spring, the buds awaken, and leaves having the opposite arrangement begin to grow. They can be with villi, smooth, glossy.The pedicel can carry one of several buds, and sometimes a whole brush. The appearance of flowers resembles bells. Their color may be different:
 bright;
- blue;
- white;
- pink;
- red;
- brown;
- Violet.
 bright;
The plant blooms from May to September. Seeds ripen in a small box. They are small, dark and have an elongated shape.
Conditions and time for growing
Do not delay with planting. To do this immediately after a period of "sleep", at the stage of awakening. If you miss this moment, the shoots will begin to stretch and turn pale due to a lack of chlorophyll.
The time of kidney formation depends on the conditions of the plant in winter. Gloxinia awakens in February-March. If the tubers have not woken up, then to wake them up, set the flower pot in a warm and well-lit place.
Preparation of soil and pot
Before planting, you need to prepare a substrate, drainage, prepare a container. Gloxinia does not impose special requirements on the composition of the soil mixture. But for its landing it is better to choose a light, well air- and moisture-permeable soil. It should have a sufficient amount of nutrients. Ready-made peat-based substrates are great for this.
If the soil is too dense, then the moisture will be retained in it, and oxygen will not be able to reach the roots. This will lead to decay and death of the plant. The size of the gloxinia container should be 4-6 cm wider in diameter than the planting material. This will allow the flower:
- develop a good root system;
- to lay a large number of buds;
- to form beautiful foliage without sacrificing culture.
Too big a pot is not worth buying for gloxinia. In it, the culture will give only leaves and will not form buds. In addition, with a large capacity, it is easy to make a mistake with the amount of water for irrigation, and this is fraught with rotting of the tuber.
How to plant at home?
Most often, gloxinia is propagated by tubers and seeds. Each of these methods has its own characteristics. Consider how to plant gloxinia with tubers and seeds.
Tuber
Gloxinia planting activities should be carried out according to a specific plan.:
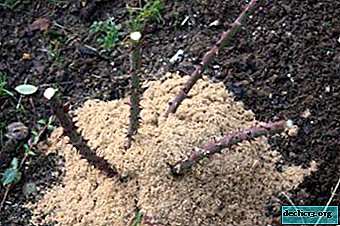
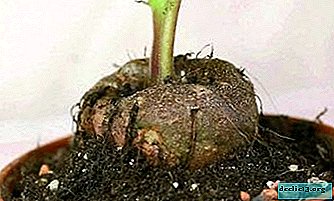 Lay out the drain using expanded clay or polystyrene. The height of the layer is 1-2 cm. Pour the soil from above, which should be loose, but rather loose.
- In the center of the pot, make a deepening and place the tuber there with the convex side in the ground. Sprinkle lightly with earth. Make sure that 1/3 of the tuber remains above the soil. Moisten the soil.
- Create a greenhouse effect by putting a plastic bag on the pot. Install the container in a warm and well-lit place. This will keep the soil moist for a long time.
- Every day, remove the bag for 20 minutes to air the soil.
- As soon as the first 2 leaves are formed, leave the bag only for the night, and after 2-3 days, remove it altogether.
- At first, water the flower very carefully, using a small amount of water. Make sure that no liquid enters the plant. Already this year gloxinia will delight everyone with its luxurious and lush flowering.
 Lay out the drain using expanded clay or polystyrene. The height of the layer is 1-2 cm. Pour the soil from above, which should be loose, but rather loose.
Watch the video on planting the gloxia tuber:
Seeds
Landing measures are carried out as follows:
- Add small expanded clay to the bottom of the container. Lay the soil composition over it. Preheat it in the microwave. Use a moist substrate for planting, but there should not be an excess of moisture in it. It is better to spray the ground with a spray gun.
- Fill the soil with a container so that it does not reach the edges by 4-5 cm. It is not necessary to compact it. Use gloxinia nutritious, loose and light soil. Sleep on top of it with sifted peat.
- For planting seeds, you do not need to perform grooves. Sprout planting material in the light, so that it is not necessary to sprinkle it with earth. Just lay on top of the soil, lightly spray with warm and settled water. If the seeds were yeast, then the drying of the nutrient film must not be allowed.
- For convenience, place the seeds on a sheet of A4 paper, folded in 2 times. Using a needle, carefully move the seeds to the ground. Spray from a spray gun with a distance of 40 cm.IMPORTANT: If this is not done, then the deep planting material will enter the soil and its similarity will deteriorate.
- When the grains are evenly distributed over the substrate, cover the container with a film with small holes for ventilation.
- Ventilate the container with seeds 2 times a day for 10-15 minutes. This will prevent the formation of condensation on the film.
- For 2-3 days after the emergence of seedlings, the film is gradually removed from the container.
- The first pick is performed 1 month after germination. 1 rosette of full leaves will appear on the plant. The first pick is necessary when the gloxinia seedlings are thickened. Leave a distance of 2 cm between the seedlings.
- The second time to dive 2 months after germination. Young plants should have 2 pairs of leaves. Transplant them into the ground with the same composition as before. Keep a distance of 4-5 cm between the seedlings. The final pick is performed when the plant has 3 pairs of leaves.
- Plant seedlings at a distance of 10 cm and in separate containers.
Watch the video on planting gloxinia seeds:
Houseplant Care
Lighting
 Keep a container with gloxinia in a bright place, where there would be no direct sunlight. Light must be diffused.
When gloxinia propagates in the autumn-winter period, keep the pot under a daylight lamp at a distance of 40 cm. The distance is determined taking into account the lamp power. The more powerful it is, the further the container is located. The duration of daylight hours is 12-14 hours. If this condition is not observed, the seeds will not germinate.
Temperature mode
Contain a container with planting material at a temperature of 22-26 degrees. This has a positive effect on seed germination rate. As soon as the first shoots are formed, reduce the temperature to 18-20 degrees.
Watering
Do not allow the soil to dry out. Watering is carried out as necessary. To do this, use a spray bottle or drip tray. The main plant should not be transfused, as this will be detrimental to it. For irrigation use settled and warm liquid.
Top dressing
The plant responds positively to fertilizer, so apply them every 10 days. Use universal compositions for blooming flowers for this. During rest, fertilizer is not necessary.
Planting gloxinia is a responsible and important process, on the correctness of which the further development of the flower depends. After planting, it is important to give special care to the plant, since at first the flower is very vulnerable to diseases and pests.
Watch the video: Houseplant Hints - Gloxinia (January 2025).

-
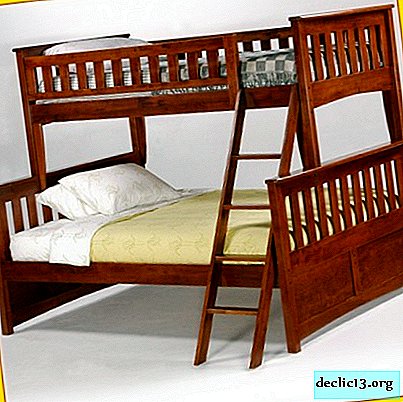
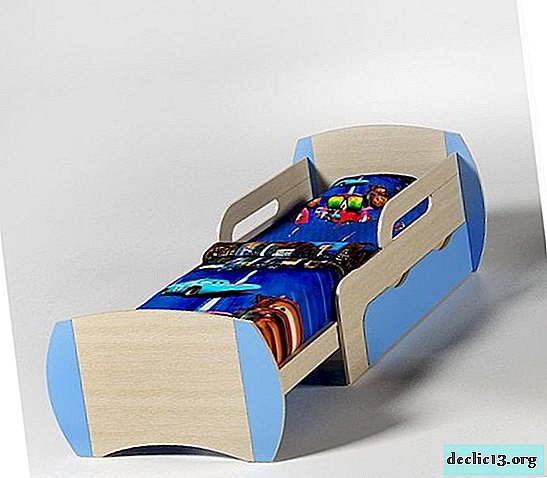
Varieties and advantages of solid wood bunk beds
When planning a bedroom setting, one often has to make a choice between comfort and free space. This problem is especially relevant for families with two or more children. If two separate berths are established, then there is no place to place a desk. An excellent solution is a bunk bed made of solid wood, which takes up less space, but provides a comfortable sleep for both children. ... -
-
-