Photo frame: the most interesting ideas and workshops
Each person has photos loved and dear to his heart. They don’t need to gather dust in the album on the far shelf. Such photos will look much better in the original frames on the wall or in special shelves. Of course, their cost is sometimes too high. Therefore, we suggest not to lose time and make original frames for photos on your own.
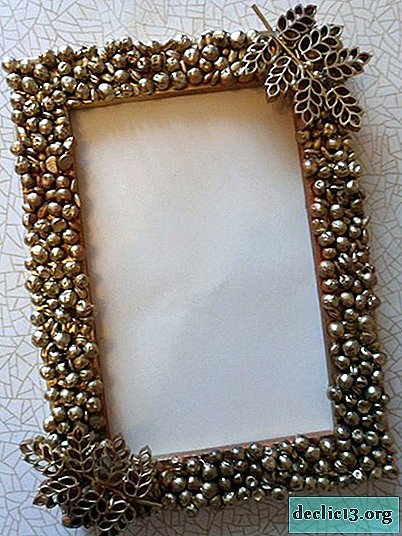


DIY vintage frame
If simple, plain frames are not your option, then we recommend that you take a closer look at vintage products. They have a special charm and a touch of the past. Therefore, such frames are ideal for storing the most pleasant memories.

Necessary materials:
- ice cream sticks or medical spatulas;
- PVA glue;
- pasta;
- white acrylic paint;
- a napkin with a beautiful vintage pattern;
- varnish;
- thick cardboard;
- brush;
- scissors.

From the sticks we form a frame and glue the parts together. Leave to dry completely.

Glue different shapes of pasta to the frame.

We color the workpiece with white acrylic paint and leave it for several hours.

On top of the frame, glue the part of the napkin you like. From the cardboard we cut the workpiece to the size of the frame and glue it on the back side. This is necessary so that the product does not bend.

We cover the photo frame with varnish on top and leave it no less than for a day.

Forged frame
Often, the cost of such products is very high. This is not surprising, because photo frames are very beautiful and heavy. If you like such products, we suggest making a similar option without metal with your own hands.

We will prepare the following for work:
- photo frame made of wood;
- glue;
- wood decor;
- spray paint in black and bronze;
- paper or newspaper;
- small capacity;
- sponge.

We put paper or newspaper on the work surface. We attach the decor to the frame and determine its ideal location.

We color the prepared frame and decor with black spray paint. Leave to dry completely.


We fix the decor on the frame with glue.

In a small capacity we collect paint of bronze color. Using a sponge or a piece of cloth, gently apply paint to the surface of the frame. After drying, the frame will have a very beautiful shade.

Soft frame
If you want to make the room more comfortable and homely, then a delicate, soft photo frame is ideal.
You will need the following:
- thick cardboard;
- the cloth;
- scissors;
- glue;
- threads
- ruler;
- pencil;
- needle;
- additional decor at will.
First of all, from cardboard we cut out all the necessary blanks for the frame.

We put a cloth on the working surface and apply all the cardboard blanks. Consider the need to make allowance for each of them. Cut out all the details from the fabric.
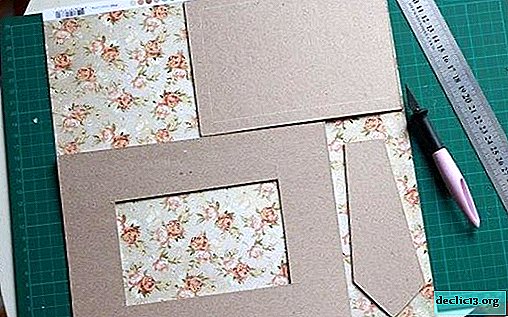
We apply a cardboard blank to a piece of fabric and fix the edges with glue.


In the same way we wrap the second blank with a cloth.

We flash the first workpiece, as shown in the photo. We assemble the parts together and, if necessary, fix with glue. A beautiful, soft frame is ready.

Concrete photo frame
Of course, simple frames look very concise and strict. But sometimes they are not very suitable for one or another interior. For example, if a stylish loft is used in the room, then a bolder version of the photo frame can also be made.

Necessary materials:
- cardboard box;
- plastic containers;
- scissors;
- concrete mix;
- materials necessary for the frame (rotary buttons, cogs and hook);
- glass;
- pencil;
- ruler;
- knife;
- Scotch;
- water.
To begin with, we disassemble the cardboard box and draw on it an approximate diagram for the future frame.

We cut off the excess part of the cardboard with scissors or a knife. If necessary, we cut out additional details.

We fix them on a cardboard blank with adhesive tape.

We prepare all the necessary details to create a frame.

In plastic containers we dilute concrete to a homogeneous consistency. We fill the cardboard blank with concrete and leave it for a long time. This is necessary so that it dries as well as possible.

We take out the frame from the mold, gently wash it with plain water and leave it to dry for several hours.


We attach rotary buttons and other details. We cut out a suitable workpiece from cardboard.

Set the glass, photo and cover into the frame. Stylish, bold frame is ready!

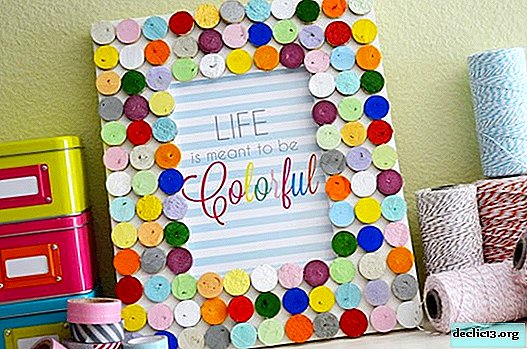
Colorful frame
Every year, minimalism in the interior becomes more and more relevant. This is not surprising, because in such rooms there is always a lot of free space and freshness. However, they also lack color. Therefore, a stylish multi-colored frame as a bright accent is the best solution. Especially if it is made by hand.
We will need:
- wooden frame;
- wine corks;
- acrylic paints;
- brush;
- glue gun;
- stationery knife.

Paint the frame with white paint. If necessary, two layers can be applied.

Using a clerical knife, cut wine corks.

We paint the surface of each of the blanks with different colors of acrylic paint.

Glue the blanks to the frame in a chaotic manner.

The result is a stylish, bright DIY photo frame!


Book photo frame
Fans of unusual decorative objects will definitely like an unusual photo frame made from a book.

Necessary materials:
- book;
- file;
- stationery knife;
- pencil;
- Scotch.

First, try on a photo on a book and make notes on its size.

Using a clerical knife, cut out the necessary part. This must be done very carefully so as not to damage the cover.


We crop the file based on the size of the photo with a small allowance.

Insert your favorite photo into the file.

Glue the blank to the inside of the book with tape.


Photo frame: interesting ideas


To make a beautiful, original photo frame is not at all difficult. After all, you can use literally everything that is in the house. Be sure to try to implement at least one idea and share your results in the comments.
Watch the video: Dead Simple Picture Frames. Easy Woodworking Project. (May 2024).


-
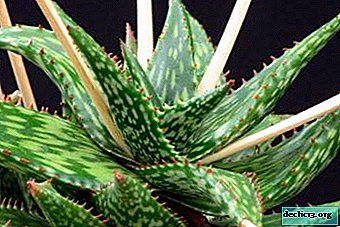
What are marigolds: a description, features and photos of flowers
Marigold is a very common, beautiful and unpretentious plant. You can see them both at city flower beds, and at amateur gardeners. Such love for these plants is explained by their diversity in the color of flowers, long flowering and simple care. However, marigolds sometimes do not want to bloom. Let's see together why this happens and how to help the plant bloom. ... -
-
-