Photo Wall Decorating: Boring Interior Solutions


Solo in design
Even a single photograph looks more expressive and interesting in the room than just a bare wall.


The reporting dynamic shot in the following example helped to solve two problems at the same time: first - the frame successfully distracted the eye from the white empty wall and low headboard; the second - the bedroom was immediately filled with energy.

Tip: when placing a photograph on the wall, it is not necessary to focus on the center - you can leave a space between the frame and the head of the bed about 20 cm.
Triptych
It is important to choose the number of photos wisely, given the size of the room and furniture. In large rooms with fairly high ceilings, you can place several large frames, while in tight ones, on the contrary, they will only reduce the wall. In this example, three large frames stand out above the sofa. Often, designers, choosing a decor, use a similarity effect, as seen in the next photo. In this case, at first glance, the objects seem to be exactly the same, but as soon as you come closer, interesting differences are immediately revealed. So, in the living room a white empty wall was decorated with a triptych. Each picture shows the same tree, but the picture is imperceptibly enlarged. This technique balanced the geometry of space: now the left side is not lost against the background of the right, where the tall window is located.
Aesthetic chaos
The overlapping frames create a feeling of slight chaos in the interior: it seems as if small and large, vertical and horizontal photos are arguing for dominance in such a visual series. Such an experiment would clearly not appeal to an experienced gallery owner, but we are not so categorical - unpredictability and mix refresh the interior.

It can't be easier
If you are not confident in your abilities to beautifully combine several photos on the wall, there are two solutions to the problem: continue reading our guide further, or not waste time thinking and traditionally place pictures along one line. For example, in the bedroom or in the kitchen, photos on a narrow shelf next to other decor items will look pretty.

Tight
Such a scenario for the location of the photo is not suitable for every interior plot: vivid landscapes, macro photography and group photographs when converged will turn into a colorful spot. But this strategy is perfect for decorating minimalist rooms, especially when it comes to strict architectural photographs.
Vertically
Forget about stamps set by museum expositions: cute photos on the wall are easy and unusual to place not only horizontally, but also vertically.
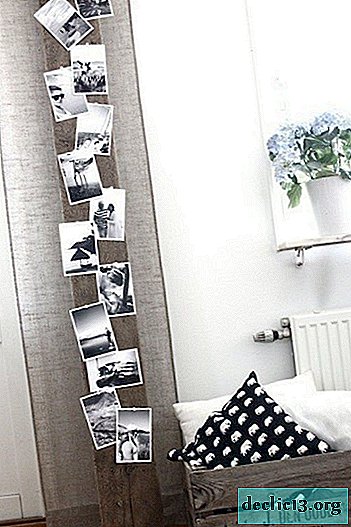
 In this room, a decorative reception successfully beat an empty narrow wall. To make the composition look harmonious, all the pictures were selected in black and white.
 Photos on aged wooden pallets look very impressive. Such a decision is what you need to give a nostalgic vintage touch to the interior.
Spotlight angle
Why not stretch the composition to both walls? This technique will definitely please the eye and will not leave indifferent all the guests.
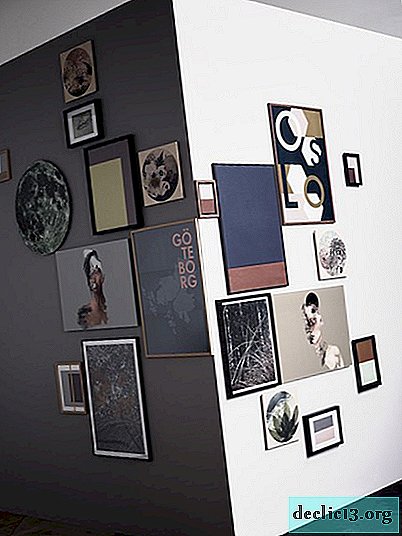

Complete asymmetry
What to do if you want to hang all the photos, but there are a large number of them? Definitely hang everything. The main thing here is to find a suitable wall in size. The lack of uniformity in the photo and symmetry should not be an obstacle to the implementation of the plan: you only need to observe two basic principles.- It’s better to place pictures at eye level. The photo collage should not be near the ceiling or, on the contrary, stick to the floor.
- the darkest large shots and photo frames are located closer to the center.


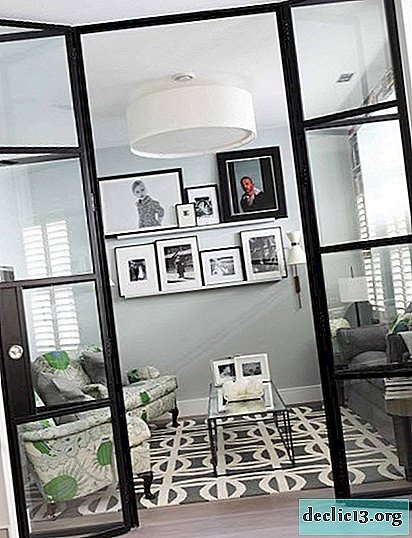
Few accents
To nicely arrange the frames with the photo on the wall, it is enough to follow a single rule - emphasize the parallels. This minimalistic room has just a few details on the wall - frames of different sizes. There are no consecutive indents and any symmetry. However, photographs fulfill their role perfectly: neat, even, they look away from the pale wall, while not overloading the interior.

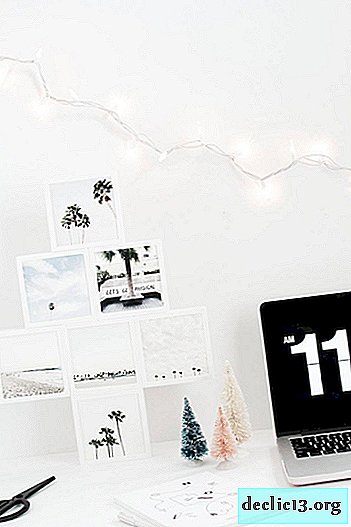
Two squares
It is not easy to arrange photographs beautifully when there are about a dozen of them, and creative clutter is not on the list of your main priorities. But you can try to assemble the elements into several rectangles or squares, as in the photo below.

Even if your pictures are of different sizes, you should not give up the idea, because they can easily be enlarged to the desired size using a mat.
Tip: so as not to make a mistake in folding the puzzle, practice on the table. Put a few canvases on the wrong side and group the composition with the photo until you achieve the desired result. Next, circle the frames, transfer the scheme to the tracing paper and attach it to the wall. Now you have the correct layout for mounting wall decor photos.

Let's have a round dance
Another idea is to surround the largest photo with frames. You can use a variety of combinations, complementing the photos with interesting engravings, old maps - the composition will only benefit from this.


In order
Rooms with rich textures and complex color schemes will not withstand competition from the expressive photo collage. Here, the simpler the photo decoder, the better. We recommend placing the frames in two rows parallel to each other and with the same indentation.
There is where to roam!
It is not necessary to dwell on the above proposed ideas. For more daring experimenters and innovators, we offer to see a very interesting selection with very non-standard interior solutions.


Watch the video: Blank Wall Solutions. Jenna Sue (November 2024).


-
Design a small apartment in Beijing
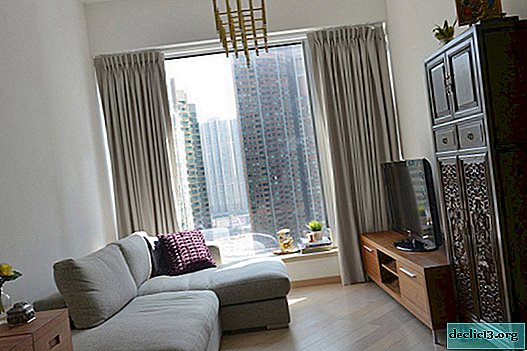
If the rooms of your apartment cannot boast a large square, if you need to place two or more functional zones in one room and at the same time you would like to maintain a sense of spaciousness and freedom, then the design project of one Beijing apartment can be useful to you. In medium-sized rooms, designers, together with the owners of the apartments, managed to place not only all the necessary furniture, but also not to limit themselves in the decor, while preserving the lightness and freshness of the image of the home. ... -

-

-