Decoupage watches: interesting ideas for creating an original interior item
Currently, the art of decoupage is very popular. It is not surprising, because this lesson not only calms, distracts from everyday fuss and everyday life, but also has an aesthetic and functional purpose. Today we will analyze the decoupage technique of watches.
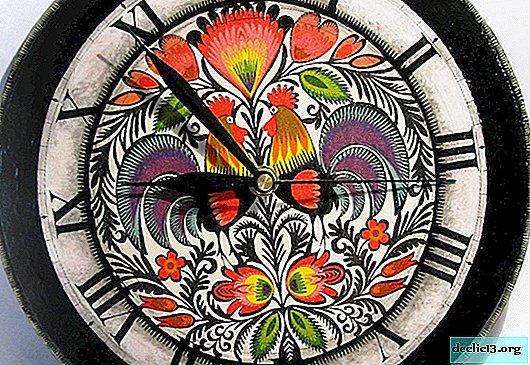


Watch Decoupage Technique
If earlier templates and materials for watch decoupage were not easy to find, now they are in abundance in any bookstore or special store for creativity. The assortment is impressive - dials, stencils, hands and other accessories. Therefore, even beginners can master new-fashioned equipment, and step-by-step instructions with examples in the photo will greatly facilitate the task.


Cooking stencil
So, the workpiece that you previously purchased in the department for creativity, you need to prepare: degrease if the watch is plastic, or sand if the wooden.

Create a background
Choose a style for the background image, depending on the interior and your preferences. Glue the picture to the base. You can use PVA glue diluted with water, or special glue for decoupage. It is important to do this very carefully so that there are no wrinkles. Next, dry the workpiece, cover it with acrylic varnish and dry it again. And so we repeat 3 times.


Choose a style
Today, the most popular is decoupage in the styles of Provence, “Hollywood” and vintage (antique).


If the directions of vintage and Provence are somewhat similar to each other, then the Hollywood style is the exact opposite. It is characterized by the following:
- color contrasts that stand out clearly from the background. The most commonly used red, black, white, blue colors;

- a lot of shine, an abundance of rhinestones;
- images of famous Hollywood stars, preferably the very Golden Hollywood era - Marilyn Monroe, Audrey Hepburn, Clark Gable, Greta Garbo and others. In this case, we get a Hollywood style inspired by the retro atmosphere.


Decoupage dial
Of course, a ready-made watch dial can be found in a special store, but it’s much more fun to do it yourself. The numbers are easy to make from different objects - it all depends on the imagination and, of course, the chosen style for decoupage watches. So, for example, in the style of Provence, wine corks, dried sprigs of lavender, etc. are perfect as a dial.

How to make an exclusive retro watch on a record?
A music record is a great watch stencil. The decoupage technique on a vinyl record is identical to that described above. However, there are still some nuances here:

- prime the plate with white paint, let dry;
- for a picture it is better to take special napkins designed for decoupage. We tear off the two lower layers and apply only the upper one to the plate. Apply glue on top of the cloth with a synthetic flat brush. After drying, coat the workpiece with varnish. Again let dry and again apply a layer of varnish.

Note: use special glue and varnish for decoupage.
- make markup for the future dial. To do this, you can use shells, wine corks and other items;
- apply at least three layers of acrylic varnish to the watch;
- paste the sticker on the back of the plate with cardboard. Then in the center we make a hole and glue the mechanism itself. We fix the arrows and insert the batteries.
Exclusive retro watches are ready! It’s also convenient to make them because the center for the arrows has already been marked. But keep in mind that the white round printing sticker is difficult to overlap. It is better to choose the option with a red sticker.

Watch decoupage is a great gift idea
By the way, a vinyl watch can be an excellent original gift for a close friend who is fond of music. A great idea is to use a photograph of his favorite artist or group as a picture.
Also, for any holiday, you can make themed watches, which will be a great option for a gift. On the eve of the New Year, having created such a masterpiece, you will not “puzzle” what to present to your dear person. To the above technology you need to add just a few bright details:

- the frame is made of soson or spruce branches, which can then be easily removed;
- any Christmas or New Year motifs will be used for the image: angels, Santa Claus, candles, snowmen, snowflakes, deers, etc .;
- figures of the dial can serve as drawings of Christmas balls or snowflakes.
Moreover, the stores also sell ready-made basics for the decoupage of New Year's watches.
Spectacular clocks can be made for Valentine's Day, and for March 8. In this case, the style of Provence or vintage will be very helpful. Having shown your imagination, try to create something beautiful or use the ready-made detailed master class with examples in the photo.


Watch decoupage master class “Vintage roses”
Vintage style conquers with its comfort and atmosphere of the past. Antique clocks will be a great addition to the interior, bring a romantic touch to the house.

For decoupage, prepare:
- blank for watches (diameter 30 cm);
- relief acrylic paste;
- acrylic primer;
- clear modeling gel;
- acrylic paints: pistachio, white, natural umber, peach;
- glue for decoupage;
- drying inhibitor;
- rice card with notes (letters) and roses;
- dial stencil;
- matt acrylic varnish;
- clockwork;
- palette knife, brushes.

Work sequence:
1. Apply an acrylic primer to the workpiece with a uniform thin layer.
2. For a whiter and smoother surface, it is better to sand it with sandpaper, and then cover it with another layer of acrylic primer.

3. Create a colored background. We use 3 shades: pistachio, peach and gray-beige (dilute the white paint with a drop of umber). Each of them is applied with a sponge with a blurry stain, gently layering the colors around the edges.

4. So that translucent light roses do not get lost on an artistic background, tint the motives with undiluted white paint on the other back.

5. Using glue for decoupage, stick the torn pieces of rice cards. Immediately musical fragments for the background, and then the main pattern with roses.

6. Soften the borders of the fragments, combine the background. To do this, take a gray-beige neutral tone, the same as in the background. You need a little paint, just to slightly powder the edges. In the process, for ease and greater transparency, it is better to add a little drying inhibitor to the paint.

7. To create a embossed dial, use a palette knife to apply a thin relief paste through a stencil. Do not try to perfectly level the surface, leave it with traces of smears - a similar texture will be interesting to look in the process of patination. After applying the paste, remove the stencil and let the relief dry.

8. Before proceeding with patination, for additional protection of the decorative layer, cover the watch with acrylic varnish in one layer. Leave to dry.

9. Give the roses volume will help a transparent modeling gel. It must be applied with strokes using a palette knife. The gel should dry completely, until transparent.

10. Patination will enhance the embossed effect of roses and dial, help to age the surface. To do this, we dilute the acrylic paint with water in the color of a natural umber to a consistency similar to milk, and add a drop of a moderator. The resulting composition is applied to the surface with a brush so that it gets into all the grooves of the relief.

11. Next, you need to wipe off the excess patina with a damp folded cloth, trying to slide along the top of the relief to leave the patina in the recesses.

We also cover the edges of the watch with the patina compound, wipe off all the excess and let the watch dry completely.

12. The finishing touch is coating the watch with a layer of matte acrylic varnish. It is advisable to apply the varnish in two layers with intermediate drying.

The original “Vintage Roses” watch is ready! It remains only to pick up the arrows and insert the mechanism. The hands can also be aged with a sponge or dry brush, covering them with a small amount of wax paste or light paint.


More spectacular examples of watch decoupage are presented in the next photo review.


