Step-by-step instructions for applying putty
How do almost any repair work begin? No, not with a cash loan ... and no, not with the purchase of an annual stock of valerian. Of course, any repair begins with putty. Many newcomers believe that "well, I can definitely putty the first time." Of course you can, if you read this article to the end! Let us consider in more detail some aspects of this seemingly simple process.
Putty application: step by step instructions
Cracks, dents and other irregularities necessarily require processing. What do we need for that?
- Start and finish putty (yes, it turns out there are several types of putty. All of them have their own peculiarities, pros and cons. If you are interested in the details of each subspecies - you are here);
- Water;
- Capacity for breeding (any deep enough bucket will fit);
- Stroymixer or stick;
- Skin and spatulas of various configurations.
Putty is divided into dry and wet. We will need dry. What for? Everything is simple - it is necessary to determine the consistency we need (thick or liquid, to whom it is more convenient). Then we take the mixture, pour it into a bucket and fill it with water at room temperature while stirring with a stick or a building mixer. The volume depends on the room, but you should not do too much - the material dries quickly. During operation, the mortar with putty should be covered with a damp cloth (at least most of it). This is necessary so that the material does not dry quickly.
Putty process itself
- To begin with, we clean the surface of old wallpaper, paint and other contaminants.
- Putty does not provide reliable adhesion of the coating coating layer to the substrate, therefore, they are usually applied over the primer layer. For leveling and applying thick putties, use a plastic or metal spatula. If the surface has a more complex relief or a small area (for example, platbands or binders), then in this case it is better to use a strip of hard rubber of the required width. And if the putty is diluted with a small amount of solution, then it can be applied by pneumatic spraying.
- Next, apply the starting putty with a layer of 5-7 millimeters. If the surface is very uneven, you can reinforce it with a special plastic mesh. A primer layer is collected on the spatula and spreads on the surface. Pressing the spatula blade will help smooth the putty strokes to a very thin layer in the horizontal or vertical direction.
- Large cracks and other irregularities must be putty first. And for puttying corners, you can use a corner spatula (a convenient tool for the same cases).
- Now we wait when the surface dries (24 hours, no more). Do not apply a new layer on a damp surface.
- Then the putty should be cleaned with sandpaper and primed again. Indeed, if you do not use a primer on subsequent layers, this will greatly complicate further work. Indeed, otherwise the material dries and thickens much faster, which means applying with a thin layer and leveling will be problematic.
- Putty is applied in several layers, for better results. But each time, be sure to change the direction of application of the material from layer to layer. When working with joints, rivets and welded holes, it is necessary to apply several layers of putty. Be sure to adhere to the thickness recommended by the manufacturers. Finishing putty is applied with a layer of 2 millimeters.
- Each layer of putty must be treated with sandpaper. To do this, they usually use a grinding skin (most often the 150th), which is folded into several layers and wound on a bar or held in hand. You can grind both wet and dry surfaces. The first method is more suitable for varnish, semi-oil and oil putties. The second is for cool ones (they erode under the influence of water). The material consumption depends on the type and type of surface of the type of bearing, the thickness of the layer and the putty itself.
Output
As you can see, applying putty is a simple process. Follow our recommendations and you will surely succeed.
Watch the video: How to Apply Putty on Ceiling Step by Step. Wall Putty Application: Step by Step Instruction (November 2024).


-
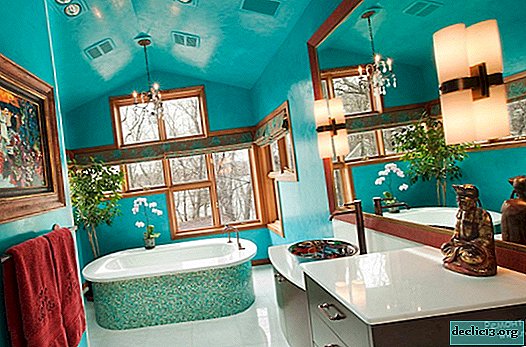
Turquoise motif
In nature, you can rarely see a pure turquoise color. It appears only at the junction of various elements. But these are the most beautiful landscapes. Here is a recipe for how to make turquoise paint. Pine resin is taken as a basis, and are added: greens of young grass; depth of a mountain lake; shine of morning dew; petals of flowering bird cherry. ... -

-
-