Ways to paint old furniture, technology and fashion trends
The key factors that can pose a threat to wood furniture are high humidity, exposure to UV rays, temperature changes, mechanical damage, fungus and mold. To create maximum protection and attractiveness, special paints and varnishes (LKM) are used. How to paint old furniture so that it lasts some more time without irritating your eyes, without spoiling the overall picture of the interior? Very simple, and there are many ways to restore. Consider the simplest and most affordable. But first, let's figure out what needs to be done for this, what tools and supplies to stock up on.
Necessary materials and tools
As for the choice of paint, preference should be given to compositions made on a water basis. These include:
- Acrylic paint - does not have a nasty pungent odor, is easy to apply, dries quickly;
- Toxotropic - has a dense consistency, after drying it is similar to plastic, practically does not leave streaks.
Before buying one or the other paint, you need to familiarize yourself with the rules of use. There are types that are designed for coloring garden furniture, they are not suitable for home use.
Varnishes are also different in composition and chemical properties. For the restoration of home furniture are most suitable:
- Water-based varnishes - non-toxic, odorless, suitable for any surface;
- Nitro-varnishes - used for painting those surfaces and parts that are most often used by humans;
- Shellac is the most expensive coloring compound. Gives a perfectly smooth and shiny gloss, durable;
- Polyurethane compounds are quite wear-resistant, create a good gloss, easily and evenly lie on the surface. It must be diluted with solvent before use.

In addition to the coloring compounds in the restoration of old furniture you will need:
- Masking tape;
- Rollers and brushes;
- Bowl for paint;
- Latex gloves;
- Protective glasses;
- Putty;
- Sandpaper;
- Solvent for degreasing;
- Sprayer, if you need to paint large objects.
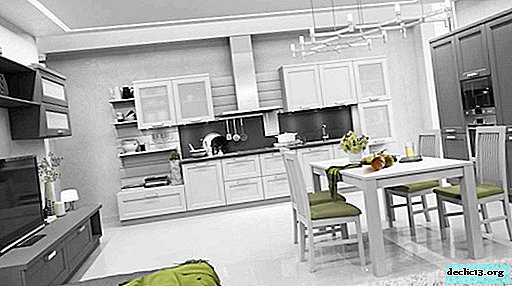
Before starting the process itself, a thorough analysis of the furniture should be carried out, for the subject of delamination, the presence of chips, damage. If there are such flaws, they should be eliminated by simple puttying, sanding and priming. Old furniture repainted in a monochrome shade, for example, black, will look beautiful and stylish. In addition, it is very fashionable today.

Preparatory work
It is clear that before repainting old furniture, it is necessary to prepare it. First of all, clean the surface for painting. There are several cleaning methods:
- Chemical - processing with special compounds. Before using them, you need to wear gloves to protect your hands, as they are aggressive;
- Thermal - the use of steam or hot air. For this purpose, a building hair dryer is used. The hot air stream destroys and softens the layer of old paint, which is easily removed with a spatula.
After analysis and cleaning, the surfaces can be painted in a new color. If the idea is to use contrasting shades, then light is painted first, only then dark. This will allow timely correction of defects, if any.
 Chemical
 Thermal
Ways of painting
All paintwork materials can be conditionally divided into:
- Decorative or decoration;
- Special purpose.
The former, in most cases, are endowed with protective properties. The second ones may have decorative properties, although they are intended for painting exterior surfaces of wood. There are several ways to paint old furniture:
- Toning - painting antique furniture or any other style only with the preservation of the structure of wood. That is, coating the surface with a transparent, translucent composition;
- Continuous repainting - the usual application of paint in several layers;
- Varnishing - applying varnish to a freshly painted surface or to an old base to create gloss.
To achieve a clear picture of wood, the surface of the furniture is best treated with stain. There are many shades of this composition on sale, you can choose the most desirable and successful.
 Tinting
 Varnishing
 Dyeing
To create a plastic effect on surfaces, it is best to treat them with a thixotropic composition. Working with him is a little hard, he has a sticky consistency, but you can still get used to it. The paint in the cans lies more evenly and dries faster. Step by step instructions for painting:
- First you need to disassemble the object to be painted - remove the doors, pull out all the drawers, unscrew the handles. Paste paper over areas that will not be painted. Do not forget to close the glass with mirrors if it is impossible to remove them from the furniture;
- Wash all parts properly with warm water and a little detergent. Allow to dry completely;
- To clean all surfaces with an emery cloth of a small fraction and to ground. Pick up the primer for the future shade. So you can reduce the number of layers and save on the amount of dye;
- After the primer dries, again go over the surfaces with fine-grained sandpaper;
- A dry brush or a household vacuum cleaner removes dust and other small debris. It is not recommended to clean with a damp cloth, as small particles of dust can clog back into chips and cracks;
- If you intend to work with paint in a container, then before starting work, you need to lay the floor under the painted object and nearby objects;
- Open the window, since painting should be carried out in a ventilated room. Hang an open doorway with a mosquito net or other similar material to prevent small insects from entering;
- If you intend to use paint in cans, you need to prepare the tray, brushes and roller in advance. Wide surfaces are painted with a roller, angles are painted with a brush, small details are painted with a thin paint brush;
- Leave the object until the first layer has completely dried, then apply the second. If necessary, you can apply a third - for a more saturated shade. But only after drying the second layer;
- These manipulations are carried out with the doors and drawers removed.
We make sure that all layers have dried well and collect everything in its place, remove masking tape or film. Before using repainted furniture, it is recommended to wait at least 8 hours.
 Coating treatment
 Cover restoration
 Remove the pens
 We color all coatings
 We process the surface inside
 Fasten the handles after drying
 Finished work
Dressing
It is possible to decorate old furniture with a decor, to complete this process is not difficult at all. This approach will be considered cardinal and fashionable at the same time. The main thing is to know what kind of paint to apply decor, in which to consistently perform the decoration process. You can use anything as a decor: drawing, making contrasting inserts, treating parts of the facade with fabric, and so on. Here are the easiest ways to restore old furnishings:
- Vinyl stickers. Not everyone is eager to first grind old furniture, then putty and primer. If she looks very boring, despite the fact that the new one can be decorated with vinyl stickers. With their help, you can revive your interior stylishly and efficiently in a very short time. Only before gluing do you still have to degrease the surface;
- Replacing hardware. Sometimes a simple replacement of handles with more creative and stylish ones can change the appearance of furniture almost beyond recognition. Especially if they have unusual shapes, for example, animals or are made in vintage style;
- Decorating with simple wallpaper. No special efforts and knowledge are required for wallpapering furniture. The adhesive here should be PVA glue. Its uniform layer is applied to the canvas and pressed tightly with a roller. After drying, the wallpaper can be coated with transparent acrylic varnish in one or more layers;
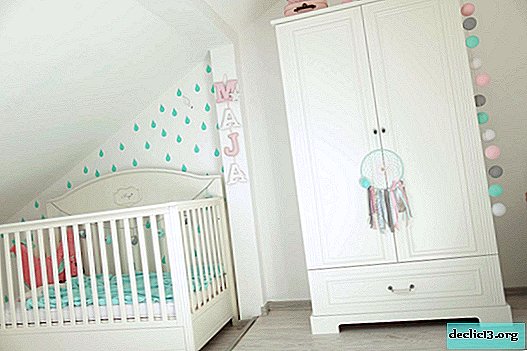
- The furniture will be colorful and unique, painted in the same style, all at once. It is better to paint the nursery in light shades, decorating it with a delicate pattern or flowers;
- It is easy to revive a room if you paint all the furniture in contrasting shades of brown, for example, brown and yellow, brown and blue, brown and green are perfectly combined, red is also suitable;
- Painting old furniture with patina or craquelure varnish is also a good option. So she will get a completely new, vintage look;
- As an alternative to painting, you can glue the worn-out interior items with a self-adhesive film, matched to fashionable valuable wood species. But this method is not considered reliable and durable. Painting in this regard is more reliable and more durable.
The nuances and secrets of staining wood chipboards in a new way:
- All materials that will be used in the work (primer, putty, paint or varnish) must be bought by the same manufacturer. So you can achieve maximum product compatibility among themselves;
- No need to be afraid of playing with colors and shades. With the right selection of the color palette, you can visually increase or, conversely, reduce the space;
- To paint old furniture with brushes of various thicknesses and shapes, large areas are better with a roller;
- So that the paint does not accidentally fall on those areas that are not planned to be repainted, it is necessary to seal with masking tape.
To preserve the appearance and prevent furniture from a very old array from drying out, it must be primed before painting. No need to immediately abandon old furniture. An exclusive approach, a little imagination and a few hours of time will radically change your attitude towards her. Knowing how to paint antique furniture can extend its life by a few more years.
 Self-adhesive film under a tree
 Replacing hardware
 Vinyl sticker
 Wallpaper for decor
 Coating Contrast
 Patina
Common mistakes
Of the most common mistakes during restoration, it is worth highlighting:
- Discoloration and seepage. They can arise as a result of poor-quality cleaning of the surface from dust, greasy stains. Before you start work, you need to study the painting technology in order to know how to properly implement it, strictly adhere to all recommendations. To correct the error, you should identify the source of pollution, remove it. And before repainting, you should always treat the surface with a special primer layer;
- Cracking of stained layers outside. The reason for this defect may be as follows: the previous layer of paint is too thick, the coloring composition has lost its elasticity and is now unable to contract or expand on top of the substrate. A small area can be scraped off, sanded, painted again. A large one will have to be cleaned of the coating with a building hair dryer and a spatula, primed and repainted again;
- Unfilled zones. This happens because the surface before painting is poorly degreased. It has wax or oil patches. The coloring composition can not evenly lay down, leaving unpainted areas and spots. Dry the painted surface completely. Sand with emery paper, wash with soap and water or any detergent, dry;
- Smudges on the newly repainted surface. This is a consequence of the uneven application of the coloring composition over a wide area or too dilution with a solvent. You can fix the flaw - after absolute drying, the accumulation of paint is cleaned with sandpaper with warm soapy water. To apply the coloring composition repeatedly, having washed the surface once again with warm water and soap, then dry it;
- Freshly wrinkled paint. This happens because the upper layer dries faster than the lower. Especially large wrinkling is formed on a thick layer;
- Freshly painted furniture dries for a very long time. This is most likely caused by improper preparation, too dirty surface. Aqueous paint can dry for a long time because it is applied in wet or too cold conditions.
Old and worn furniture can sparkle with new colors, becoming the highlight of the interior. It is enough to include your own imagination, adding a creative approach, and in a few hours to modify it radically. Any decorating technologies are appropriate here, the main thing is to use high-quality materials, not to spare time, not to neglect work, so as not to correct your mistakes later.
Video
Watch the video: Change the color of your clothes with an app (May 2024).


-
Herzliya - what is special about this resort in Israel
The city of Herzliya (Israel) has a very favorable location: on the Mediterranean coast, only 12 km from Tel Aviv. Such a close neighborhood is one of the reasons why Herzliya is known as the "rich sister of Tel Aviv." The year of foundation of Herzliya is considered to be 1924, when the Lancet family settled on the abandoned but fertile lands of the Sharon Valley. ... -
-
-