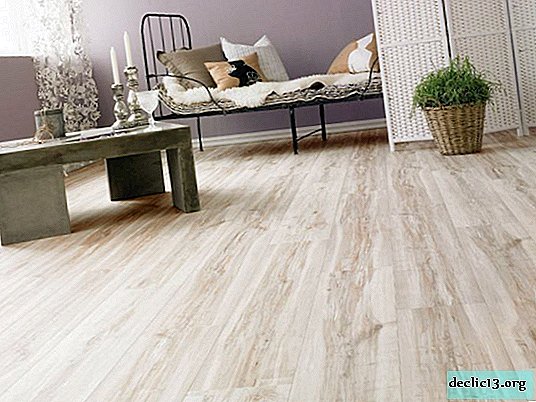
Methods of painting at home furniture made of chipboard, important nuances
Sometimes it’s not necessary to throw out the old cabinet. If the owner has a taste, then the subject can give a new life. And what a self-satisfaction furniture gives, restored with their own hands! So that she really became a subject of pride, you should carefully study how to paint furniture from chipboard at home. This knowledge will help to inexpensively refresh the look of the table, bedside tables, walls for the living room, bed, chest of drawers or stool. The tips in this article are universal for any chipboard item.
Features of work
Chipboard is a material that perfectly replaces wood. Knowing its properties will help clarify how to paint furniture from particleboard. So here they are:
- Strength - when external forces act on the particleboard, stress arises inside it that counteracts the destruction process. The limit of this property in tension is up to 0.5 MPa, and in bending up to 25 MPa. The strength of the material is due to the uniformity of its structure;
- Ease of processing - despite the significant density, chipboard is excellent for cutting, milling, grinding, gluing and staining;
- Moisture content - even after drying, the particleboard retains an average of 8% moisture. So that the right color can isolate moisture and extend the life of the plates;
- Moisture resistance - it is at the stoves slightly lower than wood, but high-quality stoves can easily carry the moist air of bathrooms. This quality also depends on what material they are lined with. The best indicators of moisture resistance in chipboard coated with plastic;
- Fire resistance - wood-based panels can inhibit the spread of fire and maintain basic qualities in case of fire. To increase fire resistance, this material is impregnated with compositions containing flame retardants. Good non-combustible paint can also enhance this property of the material.


How to choose the right paint and varnish materials
Particleboard is perfectly "friendly" with acrylic and latex paints, as well as with alkyd enamels.
Acrylic paints have significant advantages:
- Non-toxic, they can be applied directly in the apartment;
- The basis of the acrylic composition is water, so it can be diluted to the desired consistency;
- Convenience: inaccurate strokes of such paint can be removed with wet rags;
- Fast drying. Thin layers dry after a few minutes, and thick layers after two hours;
- A rich palette of rich, vibrant hues;
- The coating is waterproof and vapor tight. Its color does not fade and does not fade under the sun.
Well-established acrylic paints are called Olimp, Helle, Triora, Parade and Ceresit. Latex paints are water dispersion enamels. They are good because they do not contain harmful substances and create a durable, wear-resistant layer on furniture. The downside of latex formulations is the inability to resist microorganisms. In humid areas, mold forms on the painted surface. The most popular latex paints are KABE, DALI, Sniezka.
Alkyd enamels are resistant to moisture, and therefore they can be used for the kitchen and bathroom. Their disadvantage is the content in their composition of a toxic organic solvent. Apply such paint with caution. Alkyd materials lie flat, do not create gaps and dry quickly. Chipboard furniture is best painted with Tikkurila Miranol.
As for the choice of paint color, here you need to be guided by the requirements of the interior style. To give the furniture the effect of natural wood, you can use varnish with a warm shade.
For the restoration of the surface from particleboard, any of the above tools are suitable, but in the name of their own safety, compounds with lead should be avoided.
 Acrylic
 Alkyd
AlkydRequired Tools
For the process of furniture restoration, in addition to paints and varnishes, you will need:
- Latex gloves;
- Sandpaper (sandpaper);
- Solvent to remove old coatings;
- Degreaser-detergent;
- Rags flannel;
- Scotch tape;
- Glue;
- Hard putty acrylic;
- Acrylic primer.
The last 2 materials are necessary to prepare the surfaces for painting. The primer working on the principle of adhesion creates a reliable basis for the subsequent process. Building adhesive tape helps when several colors are used in staining. It prevents their accidental mixing. With this "assistant" you can even draw ornaments or geometric shapes.
Basic tools:
- Brushes and rollers;
- Putty knife;
- Screwdrivers;
- Knives
- The hair dryer is construction.
It is convenient to paint furniture with aerosol cans. In this case, you do not need to use a pallet, rollers and brushes. In this case, the painted object is better to be enclosed with a film like an awning.
It is important to purchase high-quality brushes, otherwise the fallen hairs will spoil the work, remaining on the painted surface. For the primer you will need a thin roller. It also needs to be carefully checked. The high-quality tool has firmly fixed foam rubber and the steady handle. In addition, you will need newspapers, plastic bags and cardboard - bedding to maintain cleanliness in the work area.

Main processes
No matter how "itching your hands" it is more likely to begin the wonderful process of transformation, you cannot immediately grab onto the brush. Otherwise, the new paint will quickly peel off. It is necessary to thoroughly approach furniture painting from chipboard and, like all significant projects, divide this business into stages. The more carefully you select them, the better the end result will be.
Before you repaint the furniture, you need to carry out preparatory work. It is more comfortable to carry out any processing of furniture if you first disassemble the item into parts. Therefore, you must first dismantle all the accessories (handles, rollers, corners), then remove the doors (at the cabinet), remove the drawers (at the chest of drawers), remove the legs (at the table). The item to be painted should be taken apart as much as possible. Metal parts can also be updated. To do this, they need to be held for 24 hours in white vinegar. The substance dissolves rust. After that, the accessories can be repainted with Zinga anti-corrosion paint.
A. Stripping obsolete
Removing the old coating is painstaking, slow labor and the most difficult stage of furniture restoration. There are two ways to implement this venture:
- Thermal - it uses a building hair dryer that heats the old coating until it melts. Softened paint and varnish are easily removed with a spatula. Instead of a hairdryer, you can use a burner or iron through foil. This method is especially good for old paint. When heated, it forms bubbles and is easier to remove. It is also ideal for the floor, since after removing the old layer it can be painted immediately, without waiting for drying, which reduces the repair time;
- Chemical (most effective) - special reagents are used here. They dissolve the resins contained in the paint, and it is removed by a scraper. Means are divided into volatile organic solvents and washes. The latter are pasty or liquid substances based on acids, alkalis or organic solvents.
 Thermal
 Chemical
The algorithm for the chemical removal of paint is as follows:
- The product is applied to a long-painted surface with a roller or a nylon brush in one direction;
- It is aged on the coating for a certain time, indicated in the annotation to the wash;
- The softened coating is removed with a stainless steel brush;
- The procedure is repeated if the coating consists of several layers.
After removing the paint, surface treatment with sandpaper is required. It gives smoothness, which will facilitate subsequent painting. Disposal of old layers should be completed by degreasing the surface with detergent.
 Apply a wash
 We clean with a spatula
 Erase with sandpaper
B. Primer and sanding
After the furniture dries, you need to check it for signs of accidental mechanical damage. If any, it is advisable to seal them with a special mixture. It is easy to prepare it: you need to mix PVA glue with small wood shavings. Putty for chipboard is also suitable for smoothing irregularities. Next, you need to wait until the putty hardens, and again sand the surface with first coarse-grained and then fine-grained sanding paper. In this case, movements should be widespread, and it is necessary to move along the fiberboard. Dust should be brushed off with a flat brush.
The following is a primer. This process provides excellent adhesion (adhesion) of heterogeneous layers, ensures uniform distribution of paint over the entire surface and reduces its consumption by three times. In order to avoid decay of the material, a hydrophobic additive can be added to the primer. It will prevent the appearance of fungus, mold and will preserve the appearance of the restored product for a long time.
The primer should be applied with a roller or brush, trying to completely soak the treated surface. One layer of it is quite enough. At the same time, the room temperature should be more than 5 ° C. The soil layer on the surface of the product will completely dry in a day. Then it will be possible to start painting.
 Putty putty
 We process sandpaper
 Apply primer
B. Painting technology
It is advisable to lay the workpiece horizontally. This will eliminate the possibility of sagging. Vertically located objects are recommended to be painted from top to bottom. Only unidirectional brush strokes or roller strokes will result in even coverage. If the paint is aerosol, then before you start, you need to shake the balloon for half a minute. It is better to apply paint from a distance of 23 centimeters.
The background layer is applied first. After it dries, after 30 minutes, the next one falls on it. In total, three layers should be obtained. Hard-to-reach places (internal corners, joints, bulges, concavities) are best handled by a radiator brush with a curved handle. Paints (especially acrylic) inevitably wear out over time. Three layers of topcoat will be an excellent protection against this. Varnish should be applied with a sponge, according to the principle of "stamp", but not "smearing."
Laminate can also be painted. The following sequence of steps is used to paint such material:
- Washing mud and degreasing - this will help the tools that break down fat. After the main washing, it is necessary to wipe the laminate with clean water and wipe it with a dry rag;
- The transformation of a smooth coating into a rough one - for this it is necessary to treat the surface with the finest-grained sandpaper. This is important to create adhesion;
- Primer - a primer on a polyurethane basis is suitable. To dry its layer should be allocated 12 hours;
- Crack alignment - latex putty will cope with this;
- Re-primer and drying;
- Staining - alkyd enamel ideally takes on the flooring from chipboard. For a laminate, it is also suitable;
- Varnishing - varnish (anti-slip) is applied with a wide brush in three layers.
How to paint chipboard furniture at home is an issue that is relevant for creative natures. This is a more interesting and profitable process than the acquisition of new furniture. In order for the result to be excellent, you need to clearly know what to paint the chipboard with. Choose the right option and go for it!
 Degrease
 We process sandpaper
 Ground
 Align
Align Reapply the primer.
 Coloring
 Varnishing
Video
Watch the video: Origami 4Drawer Kitchen Cart with Wood Shelf (November 2024).

-
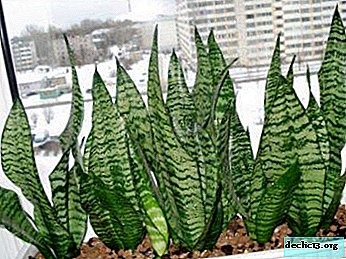
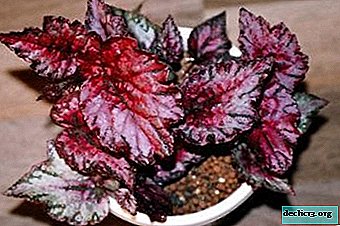
Useful and dangerous sansevieria: is it possible to keep a flower in the interior of an apartment?
To the question: "Can Sansevieria be built at home?" Experienced flower growers always answer in the affirmative. This, at first glance, modest and unprepossessing plant, is hidden in the "bins" more than one pleasant surprise for its owner. The flower does not require special care, easily propagates, stably tolerates the mistakes of an inexperienced beginner, a beautiful decoration of the home and purifies the air like a filter. ... -

-
-