Sand table, DIY instructions
Sand painting is an activity that adults and children enjoy. Such leisure helps the child to develop tactile perception, fine motor skills, and contributes to the manifestation of imagination and the development of artistic taste. Not everyone knows that it is not necessary to purchase special expensive devices, you can make a table for painting with your own hands even for a novice master from materials at hand. It will only be necessary to study the instructions and proceed in stages. The finished product will appreciate the quality and save the family budget.
Product Features
A table for painting with sand is a design with a transparent, illuminated countertop, which is surrounded by additional sides so that it does not spill out when handling sand. Separate models are equipped with special compartments for storing tools, sand. The luminous screen is made of acrylic, glass, plexiglass. Inside, light elements are placed that will not heat up during operation. The backlight helps make sand paintings more effective and expressive. In this case, it is necessary to observe the intensity of highlighting.
The light should not tire the eyes, but it is required that it be bright enough to give contrast to the patterns.
Making a table for painting with sand with your own hands is not a complicated procedure, but it will require careful following the steps of the instructions. In addition, you need to think about what materials to choose, determine the model, dimensions and shape of the future product. Self-made equipment for the creation of sand paintings will significantly save money.


Materials and Tools
Before you make a table for painting with sand, you will have to prepare the necessary components. The following materials will be required:
- boards;
- 10 mm plywood or furniture board;
- glazing bead;
- plexiglass;
- LED Strip Light;
- electrical plug;
- electric switch;
- nails
- self-tapping screws;
- water based varnish.
Of the tools you will need:
- machine for processing boards;
- hacksaw;
- screwdriver;
- hammer.
When choosing plexiglass, you should pay attention to it being thick enough, best of all white. This material is quite light, so there is no need to fear that the structure will collapse. If only transparent glass is available, then you can cover it with a protective film of white or beige color.
White glass gently scatters light, which is better for children's eyes.
For a child, acrylic will provide greater safety. It is also better to choose white, the thickness is not less than 5 mm. Among the advantages of such a material are qualities:
- high strength, resistance to mechanical stress;
- durability;
- safety when using.
Acrylic does not break, does not become cracked even under heavy loads. Therefore, there is no risk that the child will be injured.
The best option for lighting, experts call an LED strip, which has many advantages:
- it can be chosen in different configurations, dimensions, shades;
- the tape can be easily independently connected to the network switch;
- It works from a 12 volt power supply.
The brightest light comes from white light bulbs. The contours of sand drawings are clearly visible with them. If you can not find the LED strip, then it is allowed to use a Christmas garland with small bulbs instead. This lighting option is more interesting for children. Allowed if the backlight color changes. It is better that the regimes change smoothly, so the eyes will not get tired.
Often, a nightlight or an ordinary LED lamp is used for illumination. This option is also quite acceptable, with it you can vary the degree of remoteness of light from glass. However, for babies this can be dangerous, this method is suitable for older children and adults.
Light is scattered depending on the distance of the lamp to the glass.
 Transparent and white plexiglass
 LED strip kit
 Plywood
 Shtapik
Size selection
There are professionally lit tables for children and adults. They are available in various shapes and sizes:
- A full-fledged light table for an adult has dimensions 130 x 70 cm.
- For a child, a design of 70 x 50 cm is more suitable.
Children over 5 years old get products in the form of a square or rectangle. The model 50 x 50 x 75 cm is considered to be the most comfortable furniture. A light table for painting with sand with a special compartment for storing tools and art material, usually with a square screen.
Moreover, there is an opinion that the shape of the square does not favor creative flight of thought. While a rectangular screen allows you to draw vertically and horizontally, it is easier to determine the center of the composition.
Too small a screen will not allow the baby to draw wide lines and draw large details. The sides on the table will eliminate the spilling of sand on the floor. Their minimum height should be 4 cm, and it will be more convenient if it is 5-6 cm.

How to make it yourself
After all parameters are determined, materials and tools are prepared, you can begin to work. Assembling a table is a few steps.
Box creation
In order to make a table for painting with sand, it is best to purchase a ready-made box in a hardware store. It is necessary to choose a box that is suitable in size, about 7 cm deep. After that, you just have to cut a hole for the glass in the bottom.
Before cutting the hole, attach a sheet of acrylic and make markings. It is important to note that around the perimeter you need to leave 3-5 cm to fix the glass. After this, the legs should be attached to the product. If you want to add stability, then the supports can be additionally fixed between each other with straps.
The finished structure must be treated with sandpaper, painted or varnished.
 Better to use a ready-made design
Installation and electrical connection
If the master has no experience in assembling electrical structures, then for this stage it is worth using the services of a professional. Those who are confident in their abilities are required to go through the following steps:
- Prepare about 5 meters of LED strip and a 12 volt power supply (you need to select the amount for the selected dimensions of the product).
- A hole for the wire should be made in the bottom of the box.
- Next, the tape must be laid out on the surface of the box and glued. It is better to fix it in several places with double-sided tape.
- After it remains to connect the tape and check its performance.
When choosing the appropriate option, it is better to give preference to the LED strip with a white glow.
 Fasten LED strip
 Insert wire into prepared hole
 Connect power
Plexiglass Installation
The final stage is the installation and fixing of glass:
- You should choose a whatman paper of a suitable size and fix it on plexiglass. This will allow the light to scatter.
- Then you need to put the glass inside and attach it to the remaining frame on double-sided tape.
A table for painting with sand is ready. This product has many advantages, in addition to the obvious cost savings. With independent production, you can choose the dimensions, colors, shapes to your taste and the atmosphere of the room.
Making a table with your own hands is not difficult, it does not require a lot of time and money. It is enough to follow the instructions and complete all its steps. Then the finished product will bring pleasure to children and adults for a long time.


Video
Watch the video: How To Build A Sand Box Table (January 2025).

-
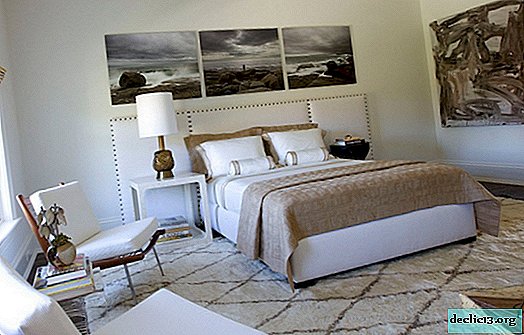
Minor and major in your bedroom
The organization of space is subordinate to any style. The design in the house is determined by the subconscious reading of information, and its acceptance or rejection of colors and shapes. One glance is enough to create a concrete impression of an object or situation in a couple of seconds. So, a look in the picture captures attention at the top of the left corner, and immediately moves to the lower right. ... -

-

-