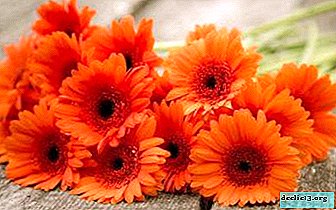
We carry out the correct gloxinia transplant
Gloxinia is a tuberous houseplant of the Gesneriev family. Place of origin - tropical forests of southern Brazil. As early as the beginning of the 18th century, a relative of gloxinia was brought to Europe - the beautiful sinigeria. This small grassy inconspicuous plant gave rise to modern gloxinia.
For more than 200 years, breeding work has been carried out on the cultivation of various varieties of gloxinia, their appearance is now far from the sinigeria, and the number of species and the riot of colors can not leave indifferent the inveterate gardeners. In order for the plant to please the eye for a long time, you need to know all the intricacies of home care and timely transplants.
Description
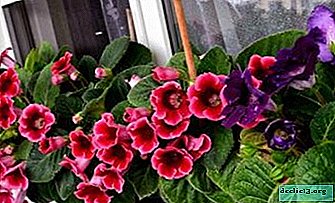
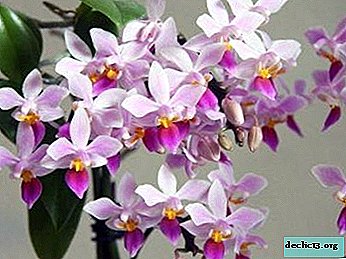
Gloxinia is a perennial herbaceous stemless or short-stemmed plant with fleshy shoots up to 25 centimeters high. The leaves are large, dark green in color, velvety to the touch, externally visible on them a slight pubescence, because of this they seem dull and dull.
Leaves of regular ovoid shape, can reach 20 centimeters long. The flowers are large, the buds look like bells. The flower, like the leaves, is velvet. The edge of the petals is corrugated. Flowers can reach 8-12 centimeters in diameter. The colors of these bells can be varied, and there are also flowers with a border around the edge of the petals or speckled. The stems are short, an umbrella differs in the inflorescence, each flower on a separate peduncle.
On a note. Flowering period - from March to June, on one plant can simultaneously bloom up to 40 flowers.In what cases is it needed?
Gloxinia transplant is required in several cases:
 after the dormancy regime, the plant woke up and it appeared a small sprout, but leaves do not form;
- when buying small sprouts in an unsuitable capacity for plant life;
- when buying tubers that have not yet been planted in the soil;
- in emergency situations, when the plant is susceptible to pests (spider mites, mealybugs) living in the soil - in this case, you need to remove the tubers from the infected soil and completely clear its remains, disinfect the tubers by soaking it in a solution of potassium permanganate or means - Epina and Zircon , Remove the damaged parts of the tuber with a knife and dry with wood ash;
- in cases of the development of fungal diseases of the plant.
 after the dormancy regime, the plant woke up and it appeared a small sprout, but leaves do not form;
When should you leave the flower in the same pot?
If in early February, young sprouts with leaves are visible in the pot where the tubers slept, then the tubers, after a rest regimen, feel good in their native soil and do not require transplanting. In this case, do not immediately feed gloxinia with fertilizers, or rather create spartan conditions for the plant. Place the pot on the windowsill closer to the glass, and in order to avoid hypothermia, put a foam base under the pot.
Can this be done during flowering?
During the flowering period of gloxinia, its bush seems very voluminous and spread out. Some inexperienced gardeners may think that the plant is cramped in a pot, but this is an erroneous assumption.
Important! In no case should blooming gloxinia be transplanted; manipulation can be carried out after a flowering period.She will lose all her flowers and buds, as well as untimely intervention in the plant’s nutrition process can lead to the complete death of tubers.
Best time
In emergency cases, if the plant is threatened by pests or diseases, you can transplant at any time of the year. If nothing threatens the plant, then it is necessary to transplant it after the rest regime, and this is in late February - early March.
After the last flower has bloomed, the entire terrestrial part of gloxinia slowly fades and dies. All dead parts of the plant, after their death, should be carefully removed. A pot of tubers in the ground should be placed in a cool dark place with an air temperature of 10-15 ° C. Thus, you need to store the plant until early February. If young shoots of the plant did not appear before the end of February, then the time has come for transplanting.
Priming
 For planting gloxinia, the soil that is used to grow violets is suitable. It is advisable to add a baking powder to the soil - vermiculite, perlite, sphagnum moss. At home, you can independently prepare the mixture for planting.
For this you need to mix:
- 3 parts of land from under any deciduous tree, except oak;
- 3 parts of peat;
- 2 parts of sand.
To make the soil as useful as possible, it is worth adding 200 grams of humus for every 5 liters of soil. This maneuver will enable the grower to do without an additional crust of gloxinia for a long time to come. And also an important step is the disinfection of the soil, this can be done with the purchased product Maxim (1 ampoule per 2 liters of water).
In the disembarkation of gloxinia, good drainage plays an important role. For this, foam polystyrene, expanded clay, crushed stone are suitable. The higher the pot, the higher the drainage level, up to 1/3 of the total soil volume.
Vessel selection
The pot for the safe growth and development of gloxinia should be 4-6 centimeters wider than the planted tuber.
Reference. The height of the pot should contain a maximum of 2-3 centimeters of drainage and a layer of soil in which the tuber will be completely placed and it should not look out.When transplanting from one pot to another, remember that between the drainage and the tuber there must be enough soil for the growth and development of the root system of the plant. The shape of the gloxinia pot does not matter much. It is important to comply with the requirements for its height so that the leaves of the plant do not fall down and do not touch the surface on which the pot is placed. It is better to make higher drainage than a tender plant will begin to die from unwanted contact with surrounding objects.
Home Tips
Detailed instructions for planting and replanting gloxinia tubers:
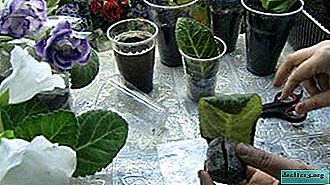
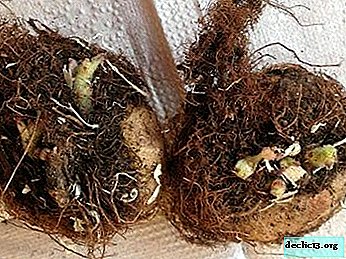 When transplanting a tuber, check its integrity and quality. A good tuber should be dense, not flabby, its diameter not less than 4 centimeters. There should be no mold or rot on the tuber.
- Remove all hairs and soil residues from the tuber, since the tuber should be as bare as possible (like potatoes) before planting.
- Put drainage at the bottom of the pot.
- Pour soil over drainage.
- Make the soil as loose as possible; you can add hydrogel capsules to preserve moisture.
- Make a recess in the center of the soil and put a tuber in it.
- Cover the tuber with earth, do not crush or compact.
- If the tuber already has a small shoot, you can not fill it with soil, but when watering, in the future, avoid getting water on it.
 When transplanting a tuber, check its integrity and quality. A good tuber should be dense, not flabby, its diameter not less than 4 centimeters. There should be no mold or rot on the tuber.
How to plant?
There are five ways to propagate and plant gloxinia:
Petiole
- To grow a flower from a leaf, you need to take one leaf from the bottom of the plant in June-July.
- Place the cuttings of the sheet in a container of water so that it is immersed in water by 1.5-2 centimeters.
- Do not change the water, but periodically top up.
- Keep the leaf in water until young roots are formed on the handle.
- After this formation, plant a young shoot in the ground to a depth of 2-3 centimeters. For better rooting, cover the stalk with a glass jar or plastic bag.
Watch the video on the propagation of gloxinia with leafy cuttings:
Stem cuttings
In adult gloxinia, cut the lateral lower shoot with several leaves. Place it in a container of water until the roots form, as is the case with the leaf. After the appearance of the roots, plant the plant and rootby creating a greenhouse effect with a glass or bag.
Leaf
 At the very bottom of the outlet, cut off the sheet.
- Cut the leaf plate from the back side across the protruding veins in thickened places.
- Put the sheet on moist soil and press down the cuts to the soil.
- Create a greenhouse effect using film.
- In the places of the cuts, roots will soon appear, and after that there will be small nodules, which then need to be planted according to the standard scheme.
 At the very bottom of the outlet, cut off the sheet.
Read more about leaf gloxinia propagation here.
Tuber division
- Only large tubers that have two or more processes are subject to division. It is cut with a knife so that there is a sprout on each part.
- Slices need to be sprinkled with charcoal and dried for 3-5 days.
- Planted in moist soil, like whole tubers.
Seeds
The seeds of a plant are formed by artificial pollination. On the second day after the bud blooms, you need to transfer the pollen to the flower with a small brush. Ripen seeds in boxes for 2 months. Gloxinia seeds are moistened and covered with glass until young shoots are formed. 2 weeks after germination, the glass is removed and seedlings are placed in the light.
On a note. You can dive gloxinia after the appearance of a full leaf on the sprout.In more detail about how to grow a flower from seeds, we talked about in this article.
Care
There are a number of rules for caring for gloxinia at all stages of its growth and development.
Growing temperature
This indicator may vary under various conditions:
- at the stage of tuber germination, the temperature should be - + 25 ° C;
- after rooting - + 18 ° C - + 22 ° C;
- at an early stage of vegetation - not lower than + 18 ° C;
- during the active growing season - from + 22 ° C to + 25 ° C.
Air humidity
 Gloxinia feels good with an air humidity of 50%, not lower. If there is no possibility of organizing such conditions, then the permissible limits of this indicator are 70-80%. To increase the humidity, it is worth placing a pot of plants on a pallet:
- with wet expanded clay;
- with water;
- with moss.
Do not spray the ground part of the plant, since gloxinia will become ill, brown dry spots will appear on the leaves and it will die.
Watering
When watering, it is recommended to use only soft water (rain, melt, boiled, filtered). Water from the pan or along the edge of the pot so as not to get on the plant. Water for irrigation should be 2-3 degrees warmer than air temperature. 30 minutes after watering, the remaining water must be drained from the pan.
Top dressing
The first 2 months after planting, you do not need to fertilize. Further dressing should be carried out 1 time in 10 days. Before buds appear, organic fertilizers alternate with nitrogen.
Note! After the formation of buds, organic fertilizers alternate with phosphate. If this is not done, then the development of the plant may still be in a state of sleeping vegetative buds.Useful video
How to transplant Gloxinia:
Conclusion
Each plant requires good care, timely transplantation and top dressing. There are no difficulties in successfully growing gloxinia flower. It is only necessary to understand as much as possible the ins and outs of the characteristics of this plant and in your home greenhouse there will be a riot of colors, in the form of multi-colored and the most diverse gloxinia.
Watch the video: Repotting Gloxinia (January 2025).


-
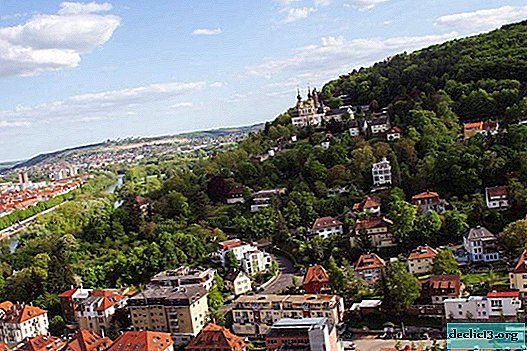
Postojna Jama - unique caves in Slovenia
Not far from the capital of Slovenia, Ljubljana, just 55 kilometers away, is the city of Postojna. Next to this city is a huge karst cave, known under the name "Postojnska" or "Postojna Pit" (Slovenia). The word "pit" in this name should not be confusing, since in Slovenian it means "cave". ... -

-
-