Cuttings or seeds: the reproduction of balsam and the nuances of its transplant

Balsam is native to tropical Africa. In total, today there are 600 species of this beautiful flower. Balsam as a houseplant has been known for a very long time and is always popular. This is probably the most popular plant in the world.
However, only some of them can be propagated at home. In this article, we will consider the main points and subtleties of reproduction of balsam alone. It will also be useful to watch the video.
Acquaintance
Balsam is a small, unpretentious plant in the form of a bush. Its stems and leaves are very fragile. There are both annual and perennial varieties. Hailing from balsam and tropical latitudes of Africa.
One of the names of balsam is Vanka wet, which fully characterizes its behavior: balsam loves water. If a sufficient moisture level is not observed, the balsam leaves will wither. In the bright sun on the surface of the sheet, brilliant droplets of moisture protrude, popularly called "Vanka's tears."
ATTENTION: You can also find the name "light", which balsam received for its unusually bright color.What are the ways of propagating a flower at home?
There are 2 main methods of propagation of balsam - vegetative and seed. More details about each of them.
Cuttings
 This is the most common and easiest method that you can implement yourself. This method is applicable only to perennial varieties of balsam, for example, Waller and New Guinean hybrids.
The main advantage of the cuttings is that the subsidiary plant retains all the characteristics of the maternal specimen. The preparation of planting material in the form of cuttings can be carried out both in spring, after waking the plant from hibernation, and in autumn during the period of planned pruning of balsam.
Training
The very first action is to cut the cuttings. The procedure is carried out with a sharp disinfected tool: a knife or a scalpel, scissors are not recommended. It is necessary to cut the apical part of the shoot 5-7 cm long, necessarily with 2-3 internodes. All leaves from the bottom of the resulting cuttings are removed.
Rooting
The necessary stage for the stalk to take root. 2 methods are used here:
- The cuttings are allowed to dry a little, then they are treated with a solution of the root growth stimulator and placed in a container with water. With the advent of the first roots, planting material is planted in the soil in a permanent place.
- You can achieve the appearance of roots by placing the cuttings immediately in the soil. In the rooting container, put perlite, compact it and make a stick with a small depression of 1.5-2 cm. Fix the handle in it. Put in a warm, bright place until rooting.
Planting in the soil
When the first roots appeared on the handle, it is ready for planting in the ground. Particular attention should be paid to the choice of soil. Balzamin prefers moderately fertile mixtures with good drainage. As for the acidity of the soil, here balsam is not whimsical and the optimal pH level varies from 6.0-6.5 points. The most suitable soil mixture contains:
- 1 part of turf land;
- 1 part of sheet land;
- 1 part humus;
- 1 part deoxidized peat;
- 1 part of sand.
Before planting the stem, it is necessary to decontaminate the mixture by treating it with a weak solution of potassium permanganate or any fungicide, or calcining it at high temperatures in a frying pan or in the oven, and it is also possible to pour plenty of boiling water on it.
Now that the soil is prepared and covered in a small but deep enough container, we make a small depression and carefully place the stalk with roots there. Moisten the substrate slightly before planting.. Balsam will begin to grow, gain strength. Over time, it can be transplanted to the intended place. Read about the intricacies of planting and subsequent care for balsam here.
Watch a video about the propagation of balsam by cuttings:
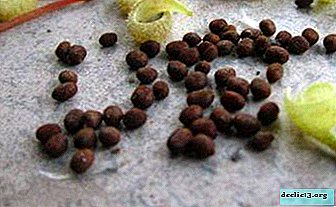
Seeds
This plant is characterized by a shortened growing season, so crops can be carried out in April-May, which is quite late. To increase the flowering period of balsam, the crops are carried out in “waves”.
TIP: Balsam seedlings can be grown both at home, in a city apartment, and in a summer cottage, directly into the ground under a warm shelter from a geotissue or in a greenhouse.Consider in detail the technique of sowing seeds for seedlings:
 Place the substrate in containers. The optimal composition is described above. Tamp, thoroughly moisten from a spray bottle.
- Place the seeds on the surface of the soil at a distance of 2-3 centimeters from each other.
- Strongly sprinkle the seeds with soil is not necessary. Seeds are sensitive to light.
- Without eroding the topsoil, moisten from a spray bottle.
- Create shelter with film or glass.
- Shelter must be removed after the appearance of the first shoots.
 Place the substrate in containers. The optimal composition is described above. Tamp, thoroughly moisten from a spray bottle.
For germination, balsam seeds need light and heat. The optimum temperature is about 23-25 degrees Celsius. Below 20 degrees the air temperature should not fall. Containers with seeds are exposed on the lightest, but protected from direct sunlight locations.
Watch a video about growing balsam from seeds:
Possible problems
- Loss of seed germination properties.
- Damage to the roots of the cuttings during planting.
- "Flooding" landing.
- General non-compliance with balsam content.
Post-transplant care guidelines
As soon as the first green sprouts appear, humidity and soil, and air need to be lowered, increasing the frequency and duration of ventilation. It is absolutely impossible to remove glass or film completely.. Plants need to be trained, first leaving small ventilation holes or opening the cover more and more, until after a couple of days they can not be removed at all.
After the glass or film has been removed, it is advisable to lower the air temperature in the room to 15-18 degrees or move the plant to an equal, cooler place. Use spraying to maintain light soil moisture. Read about how to properly care for balsam at home here, and all the details of growing and breeding at home can be found here.
Exit from room borders to the street
From the beginning of May, young balsamins begin to harden. They need to be taken out for a day outside, under the open sky, and returned to their usual conditions at night. Hardening for balsamins should last at least 2 weeks. Seedlings can be transferred to a permanent place only at the end of May, when late frosts will not be scary anymore.
IMPORTANT: Impatiens cannot tolerate lowering temperatures even to 5 degrees Celsius, which imposes significant restrictions on the possibility of early decoration of the garden with flowering balsams.The optimal distance when planting is about 25 cm between the bushes (the larger the balsam, the greater the distance should be). Balsams are photophilous, feeling better in diffuse lighting and partial shade, as well as protected, warm, comfortable growth areas.
Balsamins achieve greater decorative effect on fertile soil.. After planting, the plant will need drought-compensating watering and top dressing. This culture is gratefully responding to spraying.
Conclusion
Thus, perennial balsamins can be propagated in two ways: seeds and cuttings. Annual varieties propagate only by seed. Particular attention should be paid at the time of root formation in cuttings. Also important is the choice of soil. Observing the simple rules given in this article, you can create your own home collection of flowering balsamins.
Watch the video: Seed vs Root vs Plant Cuttings (May 2024).


-
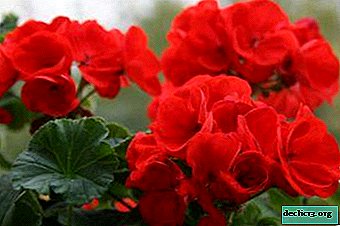
Effective tips for caring for geraniums: the better to feed and when to use fertilizers?
A beautiful plant that does not need a lot of care, which has taken a strong place among domestic plants is geranium. It would seem that nothing can overshadow the joy of admiring her, but if you take care of the flower incorrectly, then it can die. Geranium is great for growing at home. The scientific name "pelargonium" in Greek means "stork" or "crane". ... -

-
-