How and when is it better to collect marigold seeds: tips, nuances and photos
Most gardeners prefer marigolds on their site. Simple enough to land and care, they do not require special attention. In view of this, having planted them once, many people think about planting these plants for the next year. However, this raises the question of how to properly collect marigold seeds and is it worth it at all? Since the stores have a huge assortment of shapes and sizes. Maybe without additional efforts they themselves will appear next spring in the same place? It's a delusion.
Marigolds are mostly annual plants. If you still want to preserve the extraordinary decorativeness of the flower, make a little effort and time collecting seeds according to the rules and recommendations of experienced specialists. This will ensure that you get good seedlings that retain all the varietal characteristics.
Acquaintance with plants
ATTENTION: Marigolds are a genus of perennial and annual plants belonging to the aster family or Asteraceae. Homeland plants - South and Central America.Today, among the marigolds, experts count about 40 species, and cultivation work continues in many countries of the world.
The color of the marigold petals may be:
- yellow;
- reddish brown;
- Orange;
- white;
- citric;
- motley.
As for height, low and tall species are also distinguished here. So you can choose to your taste and create attractive floral arrangements.
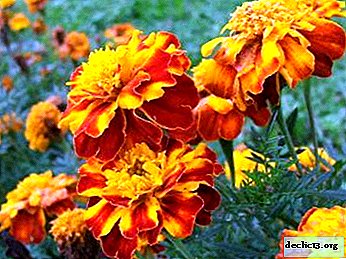
Another feature of marigolds is a fairly strong aroma, slightly reminiscent of the smell of asters. Many gardeners plant marigolds precisely for this reason. So they fight with midges, moles and other pests. For example, by planting a number of marigolds along the perimeter of a bed of carrots, you can scare off a carrot fly and add aesthetics to the garden. Read about proper planting and care of marigolds in open ground here.
What do they look like?
Marigold seeds are formed in a basket of sepals and a faded bud. If you open the basket, you will see thin, elongated, black seeds with a light fluff on the tip. Due to this appearance, marigold seeds are difficult to confuse with others.
Photo
You can see how the seeds of these flowers look in the photo:


Collection tips and other nuances
In order to collect high-quality seed it is necessary to adhere to some recommendations when planting marigolds:
- Do not plant different species too close, as cross-pollination can lead to a loss of the appearance of the original flower and the resulting plants from the seeds can radically differ from the mother plant. To avoid such a nuisance, it is necessary to plant varieties at a distance of 1.5 meters or more from each other.
- Planting marigolds in dense stands is also not worth it. This threatens to damage the fungus, and it, according to the experience of many gardeners, can be transmitted through seeds to future plants. Moreover, the appearance of diseased plants does not please the eye at all.
- For the above reason, carefully inspect the plant before cutting the seed box. Seeds should be collected only from healthy individuals.
- Based on the general recommendations for the care of marigolds, we recall that watering is necessary only until the flowering period. Further, the increased water content in the soil can lead to long ripening of seeds or even to decay of the bolls ...
- Fertilize marigolds only twice all time. The first time before the formation of the buds, the second top dressing should be done during flowering. Excess fertilizer stimulates the abundant growth of tops and thereby slow down flowering and weaken the buds. You can find out how to care for and how to feed marigolds for abundant flowering in this article.
- No less important for seed ripening are weather conditions. Full seed ripening is guaranteed only in sunny and dry weather. If the weather is damp and it is constantly raining, then you can not leave the ripening of seeds on the street. Often in such weather, the seeds rot and lose their germination. To avoid problems, on a rare clear day, cut the plants under the root and dry them indoors.
When is the best time to collect?
 The flowering period of marigolds begins in June and lasts until the onset of frost. As the inflorescences wilt, seed boxes form on the plant. This is a fairly flat fruit, usually black-brown or less often black. One such box contains an uncounted number of seeds. In 1 gram, usually 270 to 700 seeds are present.
In order to collect ripened seeds in the fall in September - early October, we start by carefully monitoring the behavior of the plant. If you notice that the petals have begun to dry, and the cup has noticeably brightened and acquired a beige hue, then it's time to start harvesting the seeds. To do this, gently cut off or cut off the former inflorescences with scissors. Then we begin to open the heads and extract the seeds. The unnecessary shell is removed.
Watch the video about the collection of marigold seeds:
Storage rules
After collecting the seed material, it needs to be sorted out and the remaining parts of the box removed. Then spread on a newspaper or polyethylene to dry. Then the seeds are collected in a bag or paper envelope, which is preferable. This will allow them to ventilate and prevent mold. Stocks are sent for storage in a warm, dark, dry place until the next season.
IMPORTANT: Remember that marigold seeds can not lose germination from 2 to 4 years.Conclusion
After familiarizing ourselves with the process of collecting seeds, we were convinced that this process is not at all complicated, and the quality of the seed is in no way inferior to the store one. Recall the most important aspects for collecting ripe seeds.:
- If you are going to harvest marigolds, you should not plant several species close to each other.
- Note the flowers you like during flowering.
- After flowering and the formation of a seed box on a plant, wait for clear and dry weather to collect seeds. If it rains heavily, it is worth cutting the plant under the root and drying it at home.
- We remove the seeds from the box, clean from the remaining garbage. We lay out for drying.
- At the last stage, we remove the collected material in a bag or paper envelope, which we place in a warm, dry place until spring.
We wish you success!
Watch the video: Art Wolfe: "The Art of the Image". Talks at Google (November 2024).


-
Railay - a picturesque peninsula in the Thai province of Krabi
Railay Beach Krabi in Thailand is a popular resort famous for its huge cliffs, stunning caves and clear sea depths. Tourists love it not only for its natural beauty, but also for a certain distance from civilization, allowing you to fully enjoy the local spirit. General information Railay Beach is a small, picturesque peninsula located on the coast of the Andaman Sea in the province of Krabi. ... -

-

-